The newly established Latvian company DIY Sound offers speaker kits to assemble at home and please consumers who enjoy building their own stuff. To know how that feels like, I had to ask for a set. That’s how the DIY Sound Light kit became this report’s subject. Enjoy!
IKEA
In September 2021 I reviewed Crescendo Duo speakers by the Latvian company Sound of Eden, which back then was a newcomer to the industry. The summary of this product describes it as “…a perfect reminder that big-bore engaging sonics from a compact yet serious and finely executed box is no fantasy. This 2.5-way affair is anything but and priced to sell, which makes it this much more appealing and accessible.”. The company’s engineering brain and founder Edijs Apenītis infused Crescendo Duo with twin passive radiators instead of the usual venting, which was a very smart choice. That’s how this gently tilted finely made speaker set produced nicely controlled monstrous bass, which was foundational for the easygoing profile far outside the typical audiophile voicing obsessed with resolution, precision and the lot. Nowadays the Sound of Eden roster lists two more floorstanders named Tempo and Trio, plus two monitors Uno and Hava. Naturally I looked forward to reviewing one of these. My next Latvian assignment however had conceptually a very different design on the menu.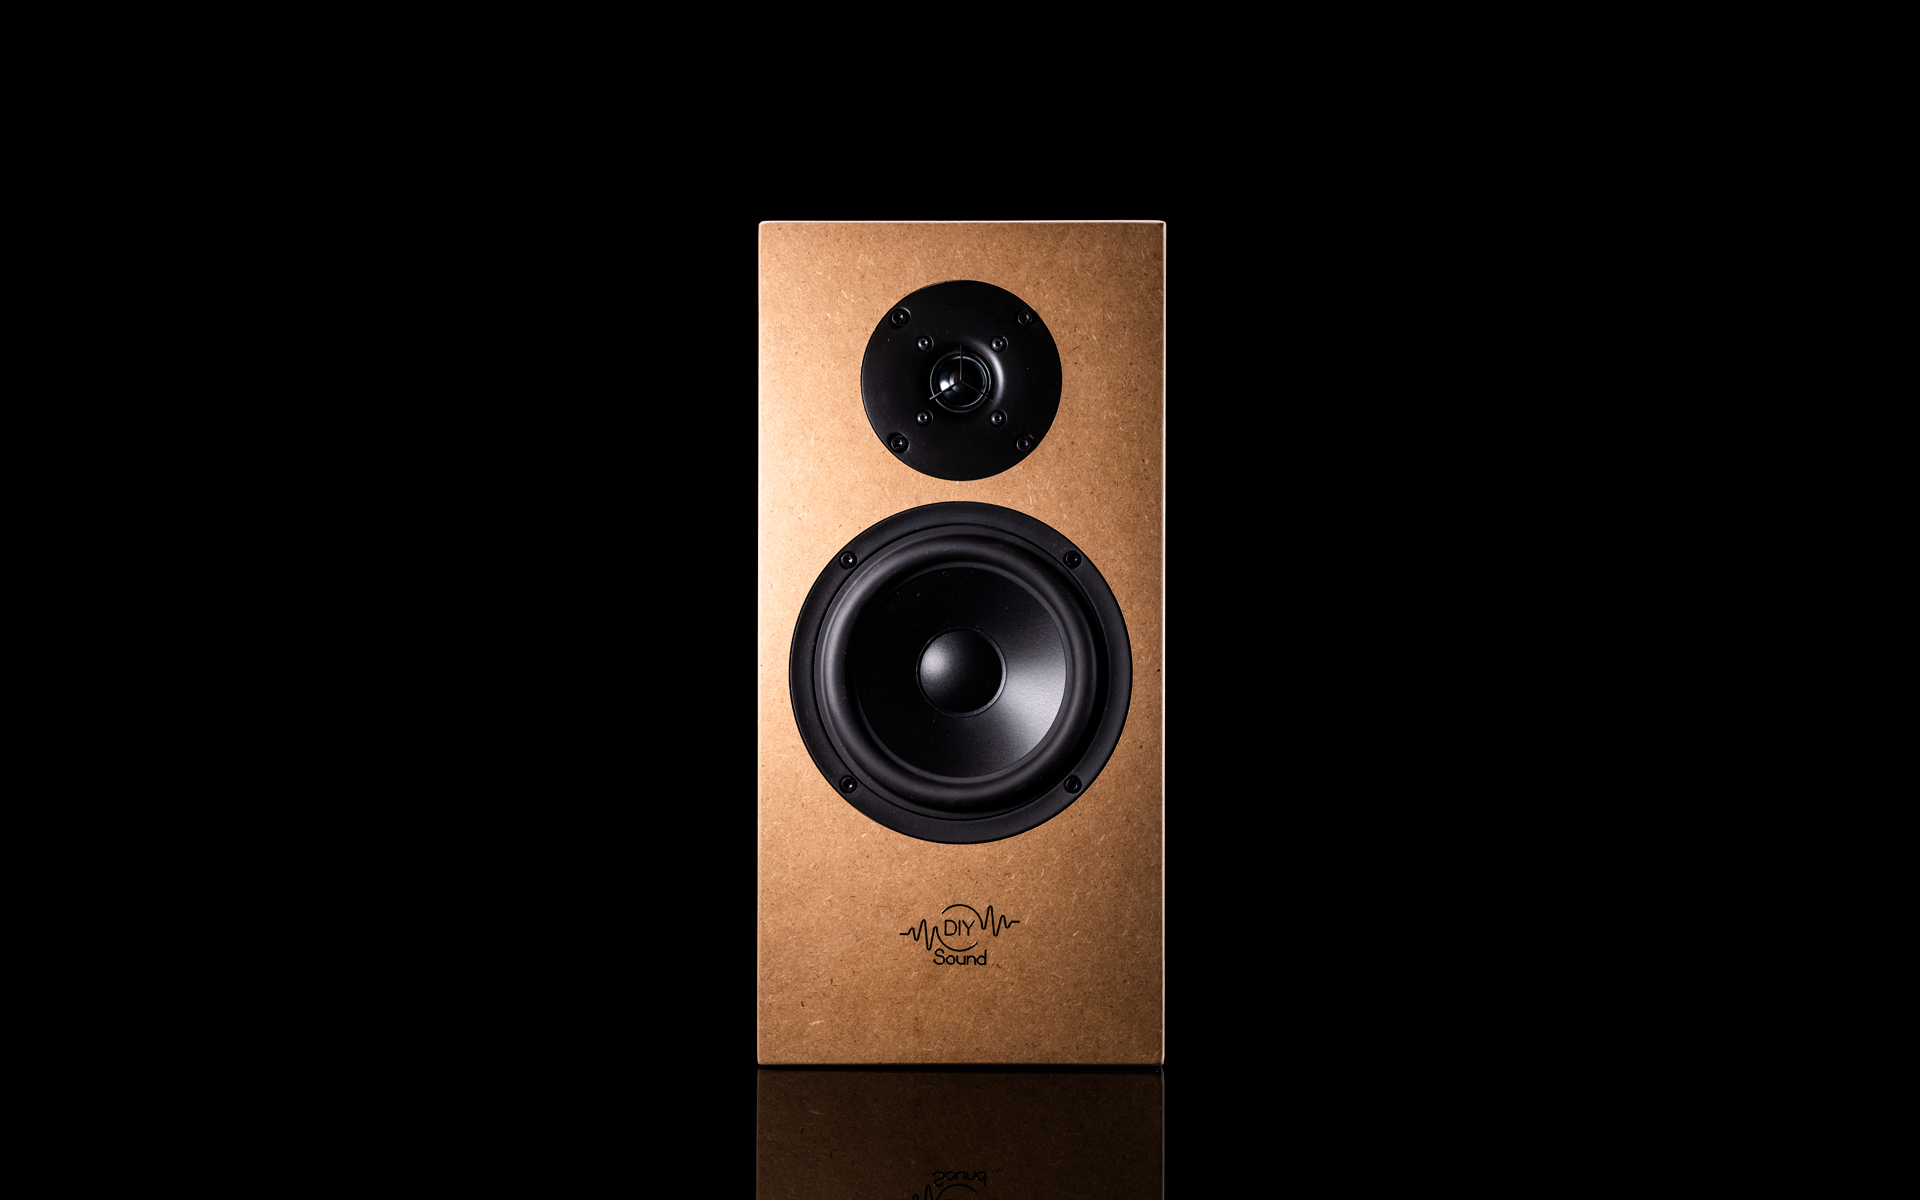 Audio companies which offer DIY kits are far and few between outfits with fully assembled goods in their rosters. During 15+ years on the reviewer beat, thus far I sampled only one former product type. I’m aware that there are more of them out there. I just haven’t had the pleasure of reviewing any other than PureAudioProject Trio 10 dipole floorstanders. This Israeli company sells speakers in the form of individual parts; drivers, frames, crossovers and baffles. They’re shipped to the destination place from several well-known subcontractors; Voxativ, Mundorf, Morel, Eminence and Beyma. Once all packages reach a customer’s address, then unpeeling their contents and assembly are on his/hers shoulders. Should you wonder why bother, it’s fun. A lot of it actually. At least that was my experience with the Israeli dipoles. A screwdriver and about two hours of my time sufficed to fully put together two these speakers. The task was done without any hiccups and struck me as spot on easy and engaging. There was also a major financial boon to this. The removal of assembly costs lowered that product’s retail price. For decades IKEA has been doing this with great success. I find it clever that PureAudioProject follows the same protocol in the audio biz.
 Building a speaker set is a creative act. Listening to the result once it’s finished feels personal, special and highly rewarding. If the subject of such efforts delivers where it matters, even more so. There’s a reason why I’m writing about this. In late 2023, Sound of Eden became the OEM supplier and R&D partner for the newcomer brand DIY Sound, which aptly named offers speaker kits. There’s a catch, however. Building PureAudioProject speakers is IKEA-level difficult. DIY Sound products significantly raise that bar. Some basic know-how related to soldering and joinery is a must to assemble one of these Latvian kits. Personally I don’t see this as a bad thing, quite the contrary. One, it’s a challenge. Two, we learn something as we go. Three, there’s a perfectly functional reward waiting for us at the end. Four, we can tell our friends all about it and probably more than they’d like to know. So five, bragging rights.
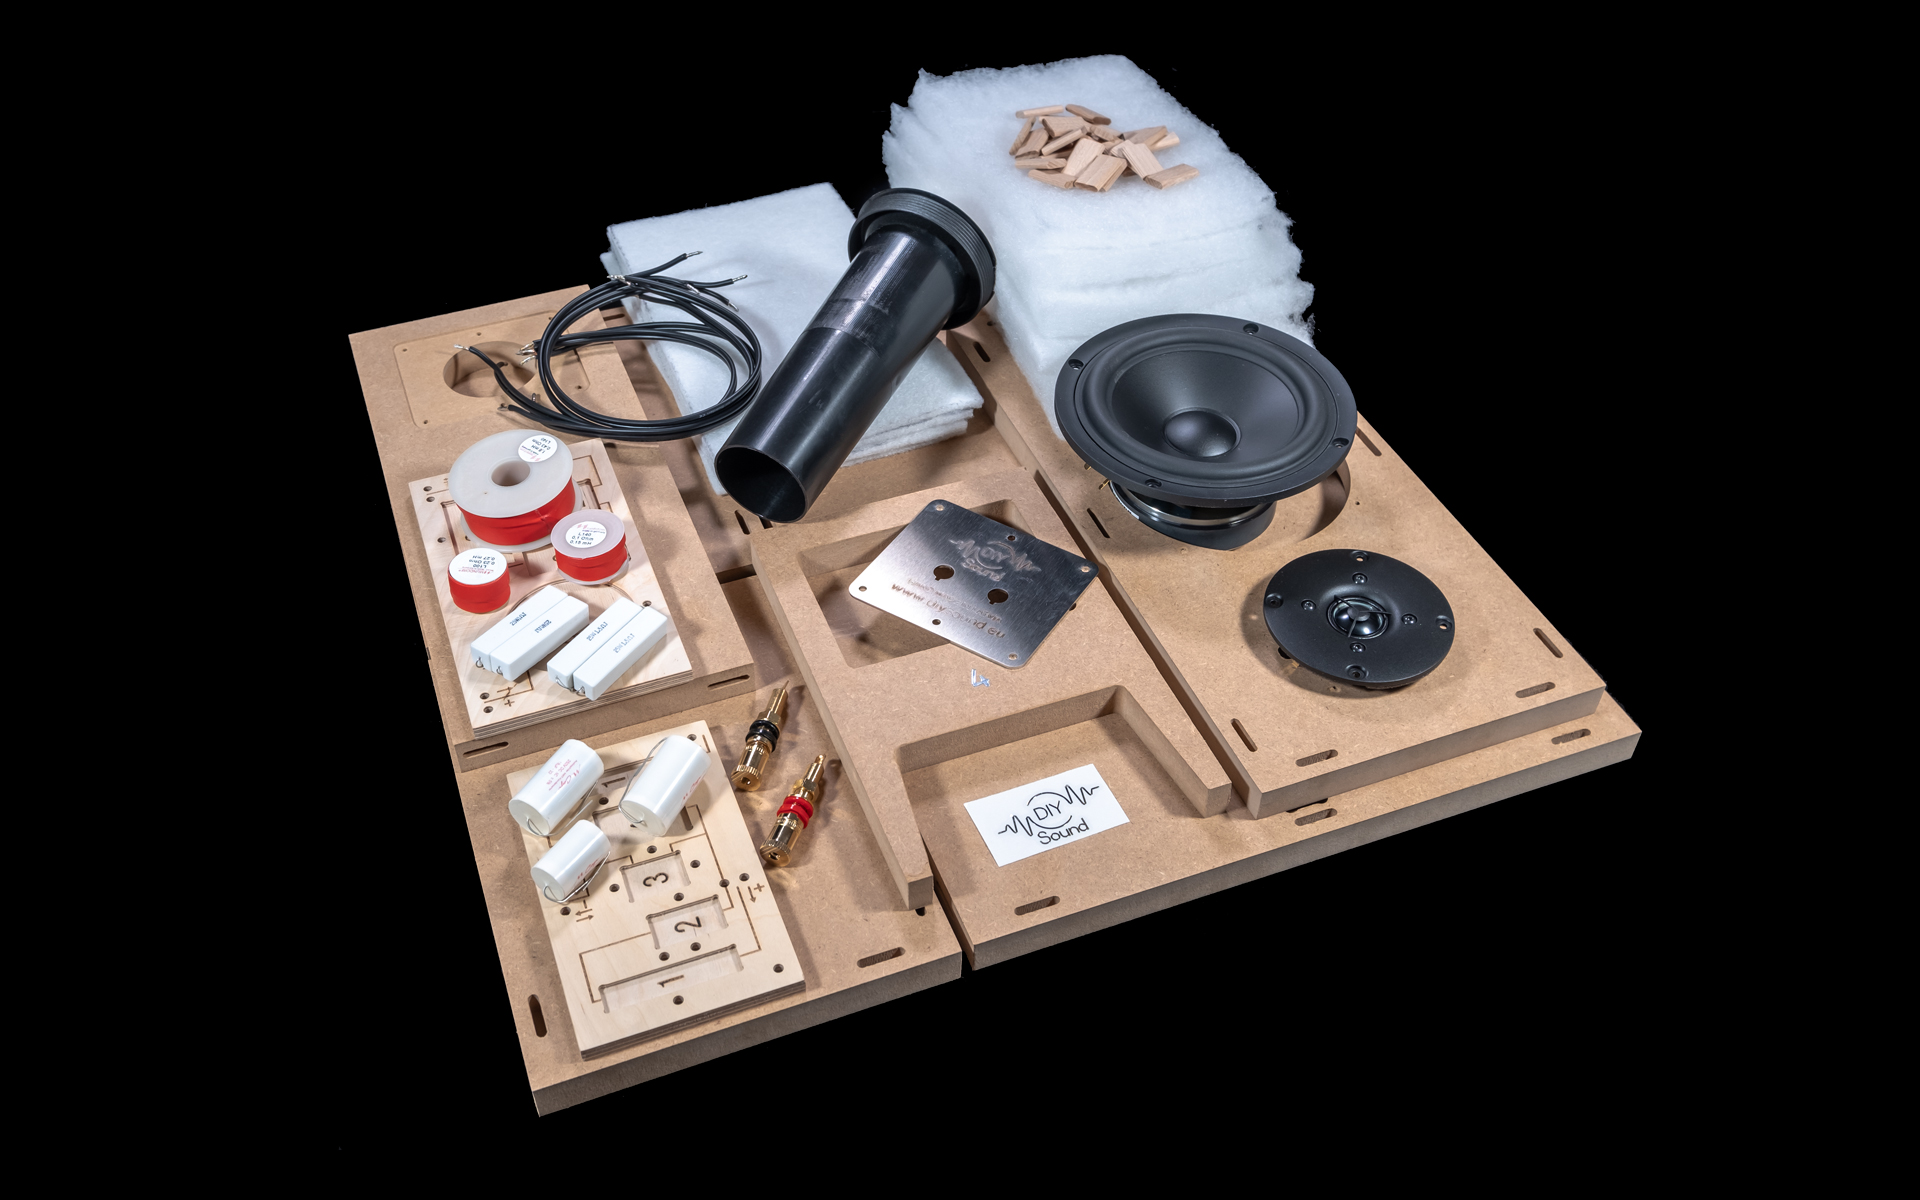 The current DIY Sound roster lists three speaker kits. Vintage is a 2,5-way über-monitor type priced at €1’399 and inspired by large Harbeths and Spendors. Passion is a 2,5-way floorstander set for €100 less. Light is the company’s stand-mount 2-way specimen sold for €899. Although I could ask for any of these, the smallest and most affordable trooper was my pick. Partially this was a reviewer laziness speaking. These days tackling the most expensive largest stuff doesn’t seem as appealing as it used to be. Every now and then, why not. Today’s story isn’t about that. It’s the exact opposite just to remain within the financially accessible realm for once, albeit with one twist that added extra hours to my schedule. To save my time, the manufacturer offered a fully assembled kit, which was a thoughtful gesture and a token of good faith. I politely declined. Instead I asked for a set which I had to put together on my own, just like a regular customer would. Ask and you shall receive. Considering all the extra labor I willingly inflicted upon myself, the choice of the smallest DIY Sound speaker felt justified.
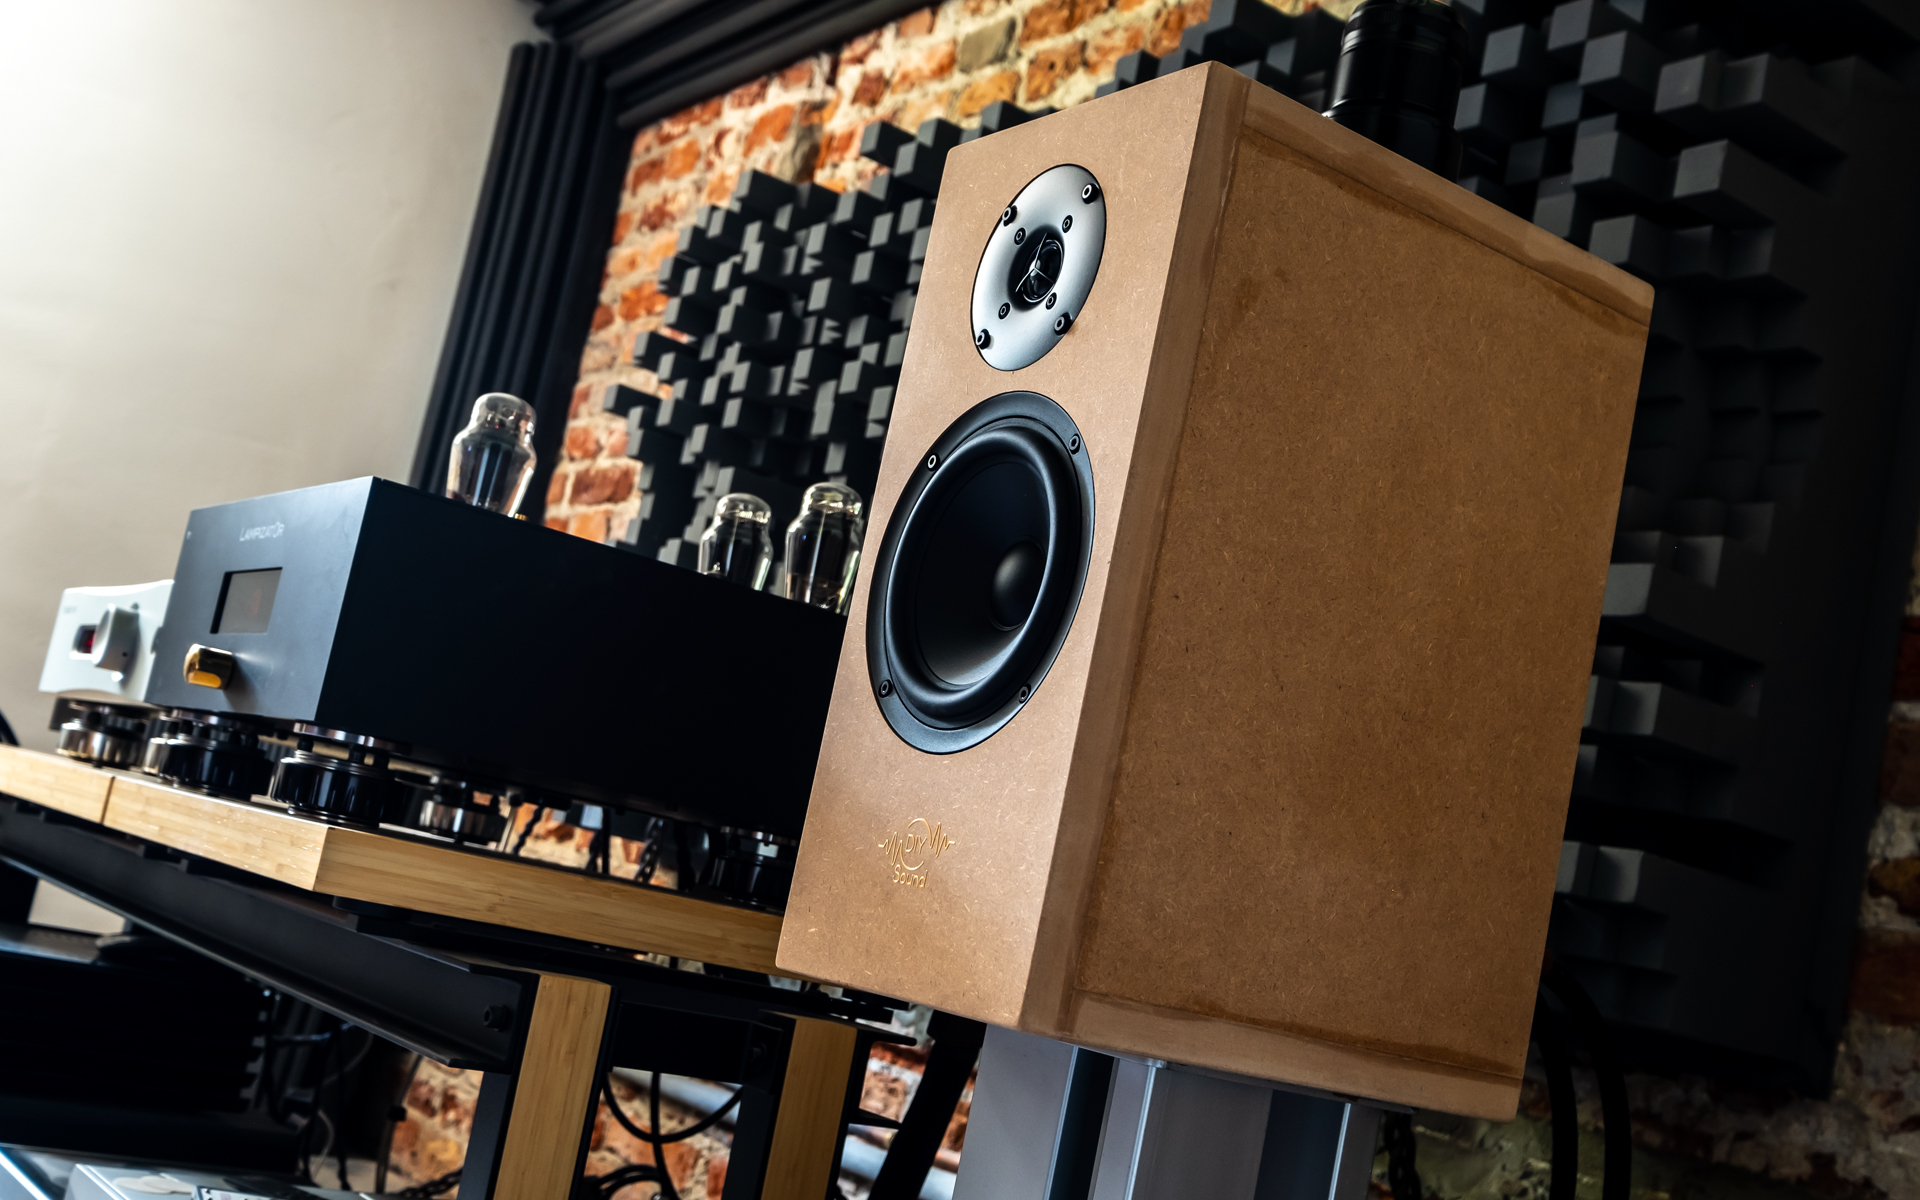
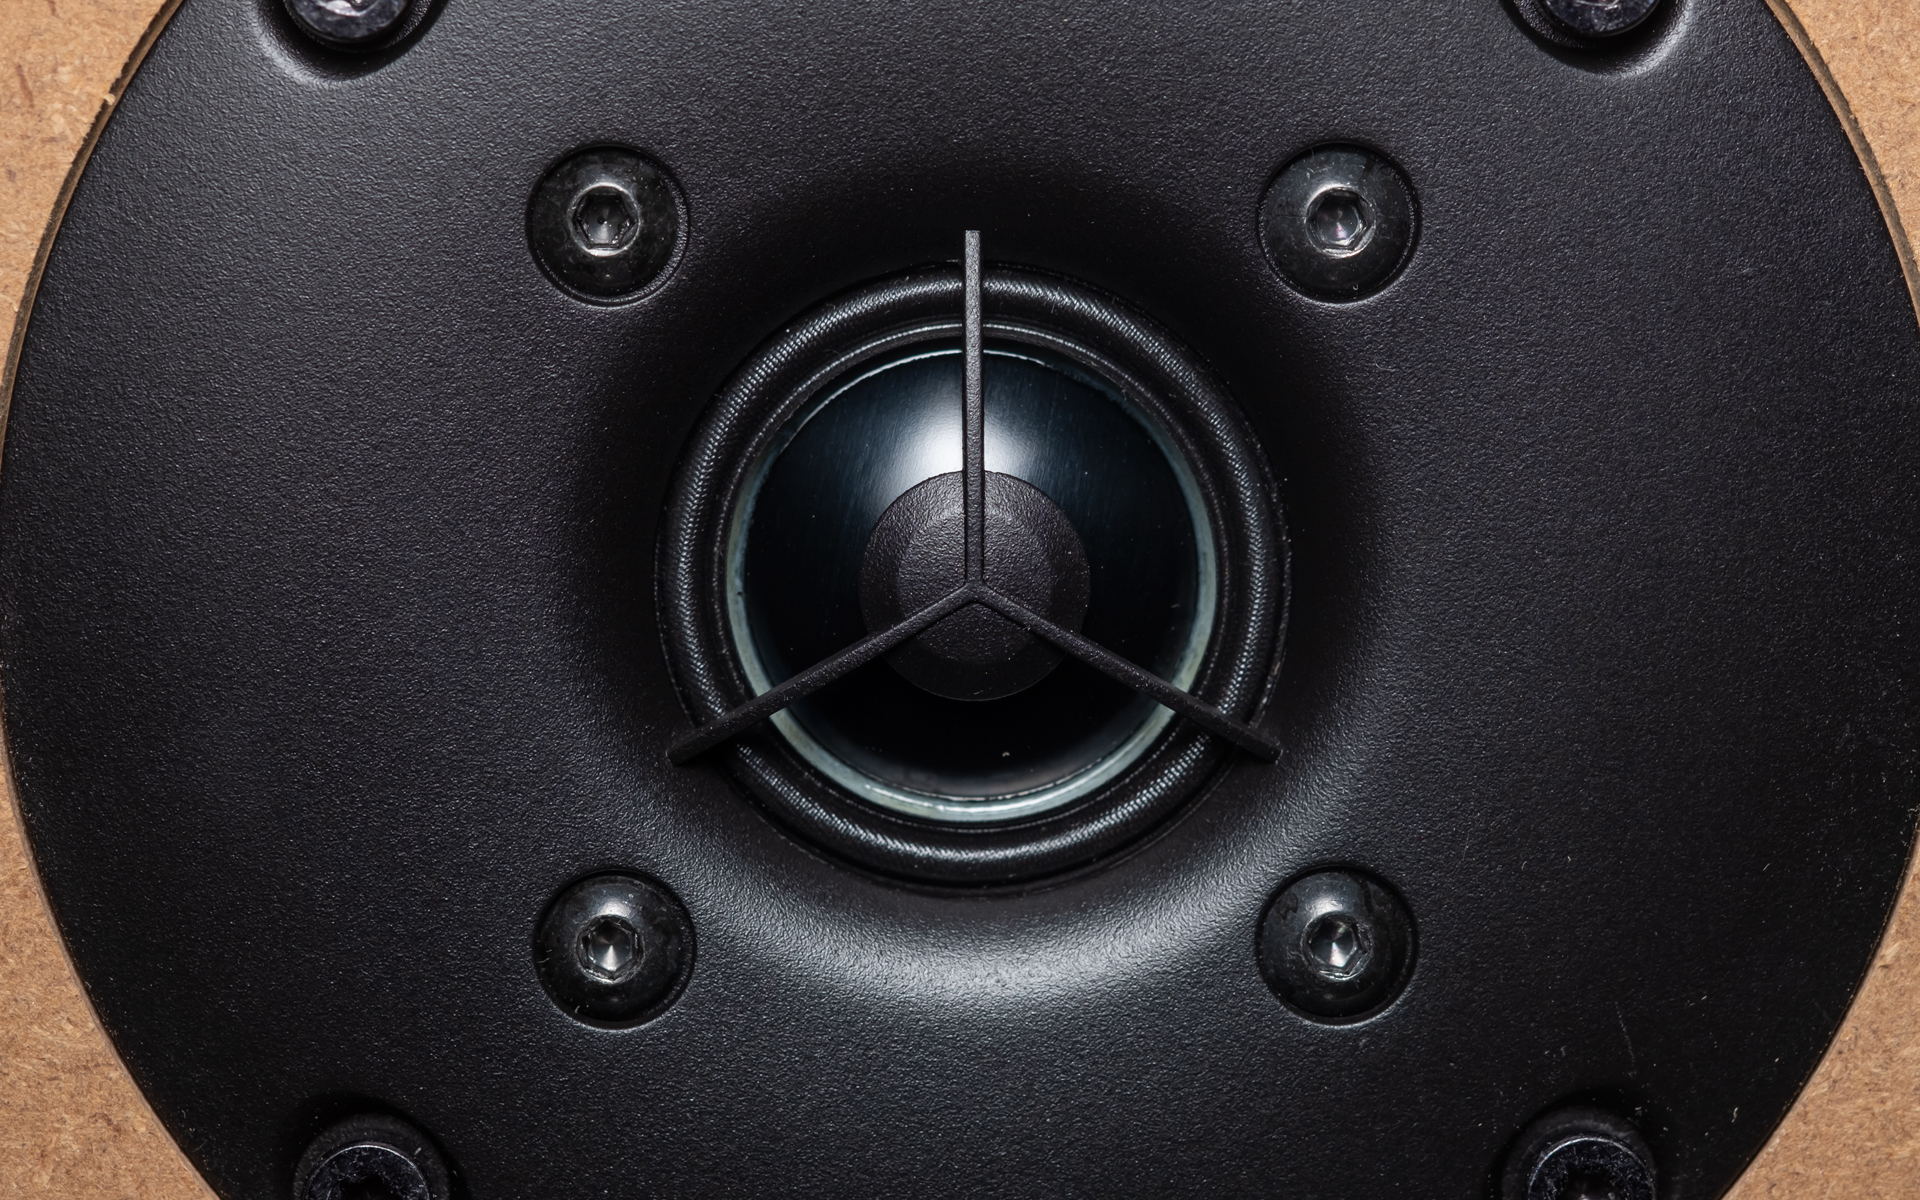
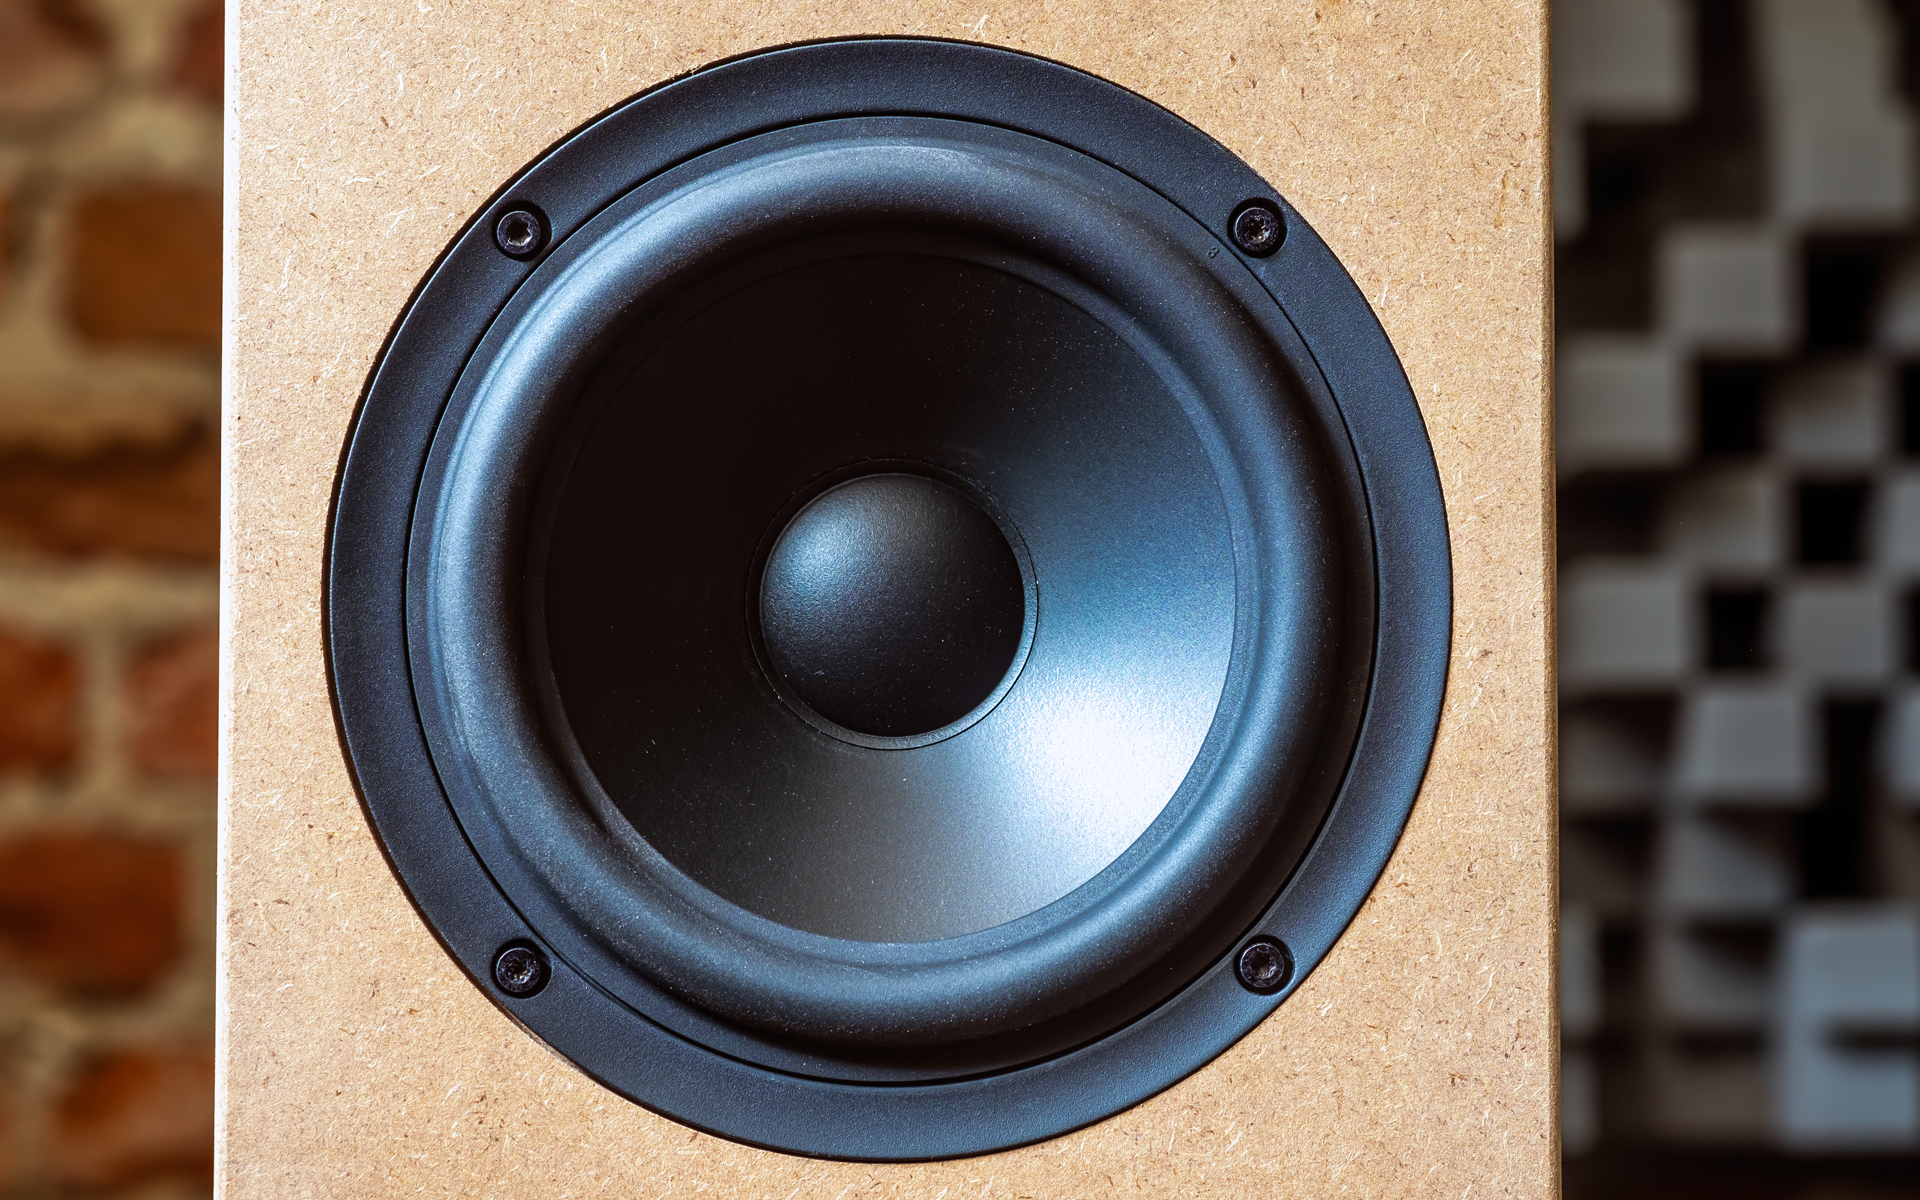
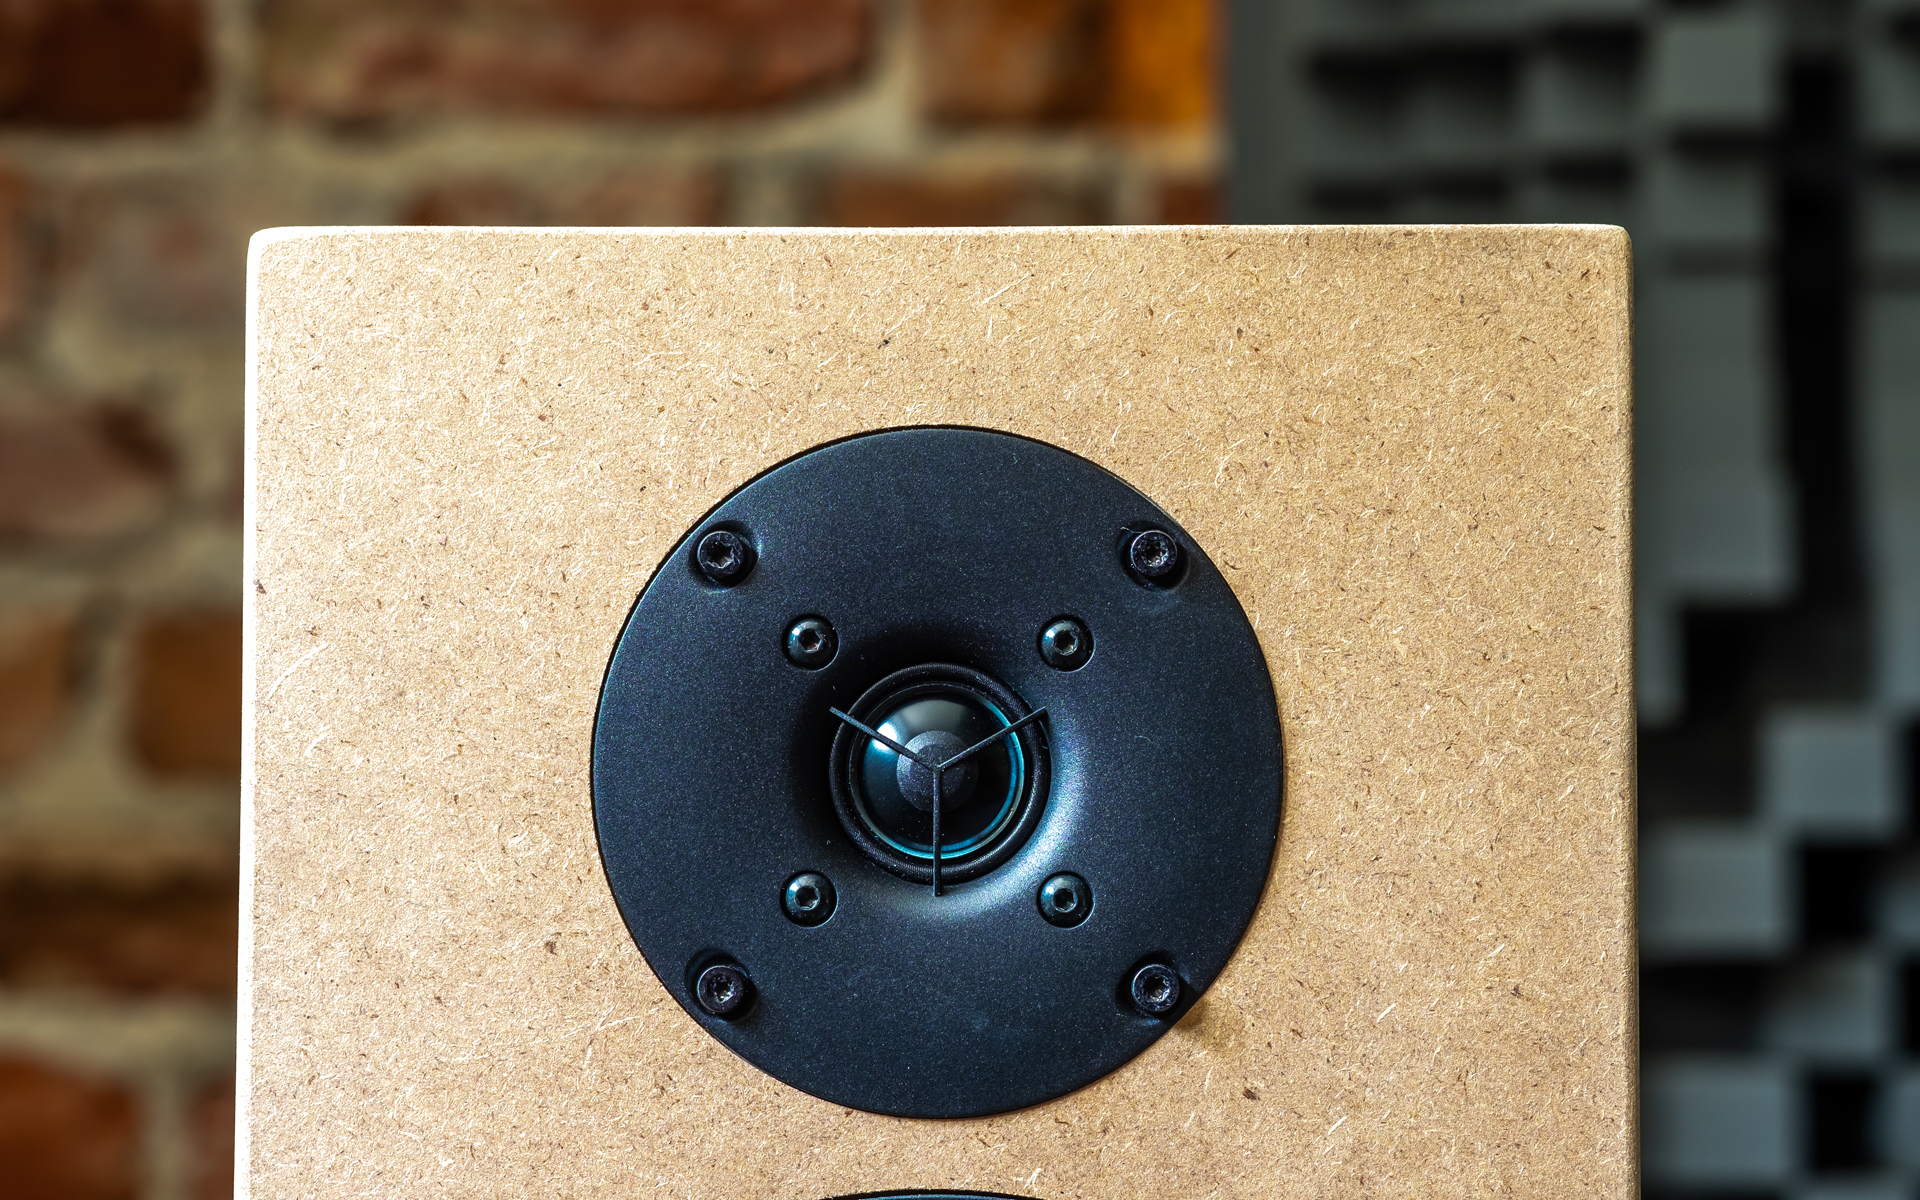
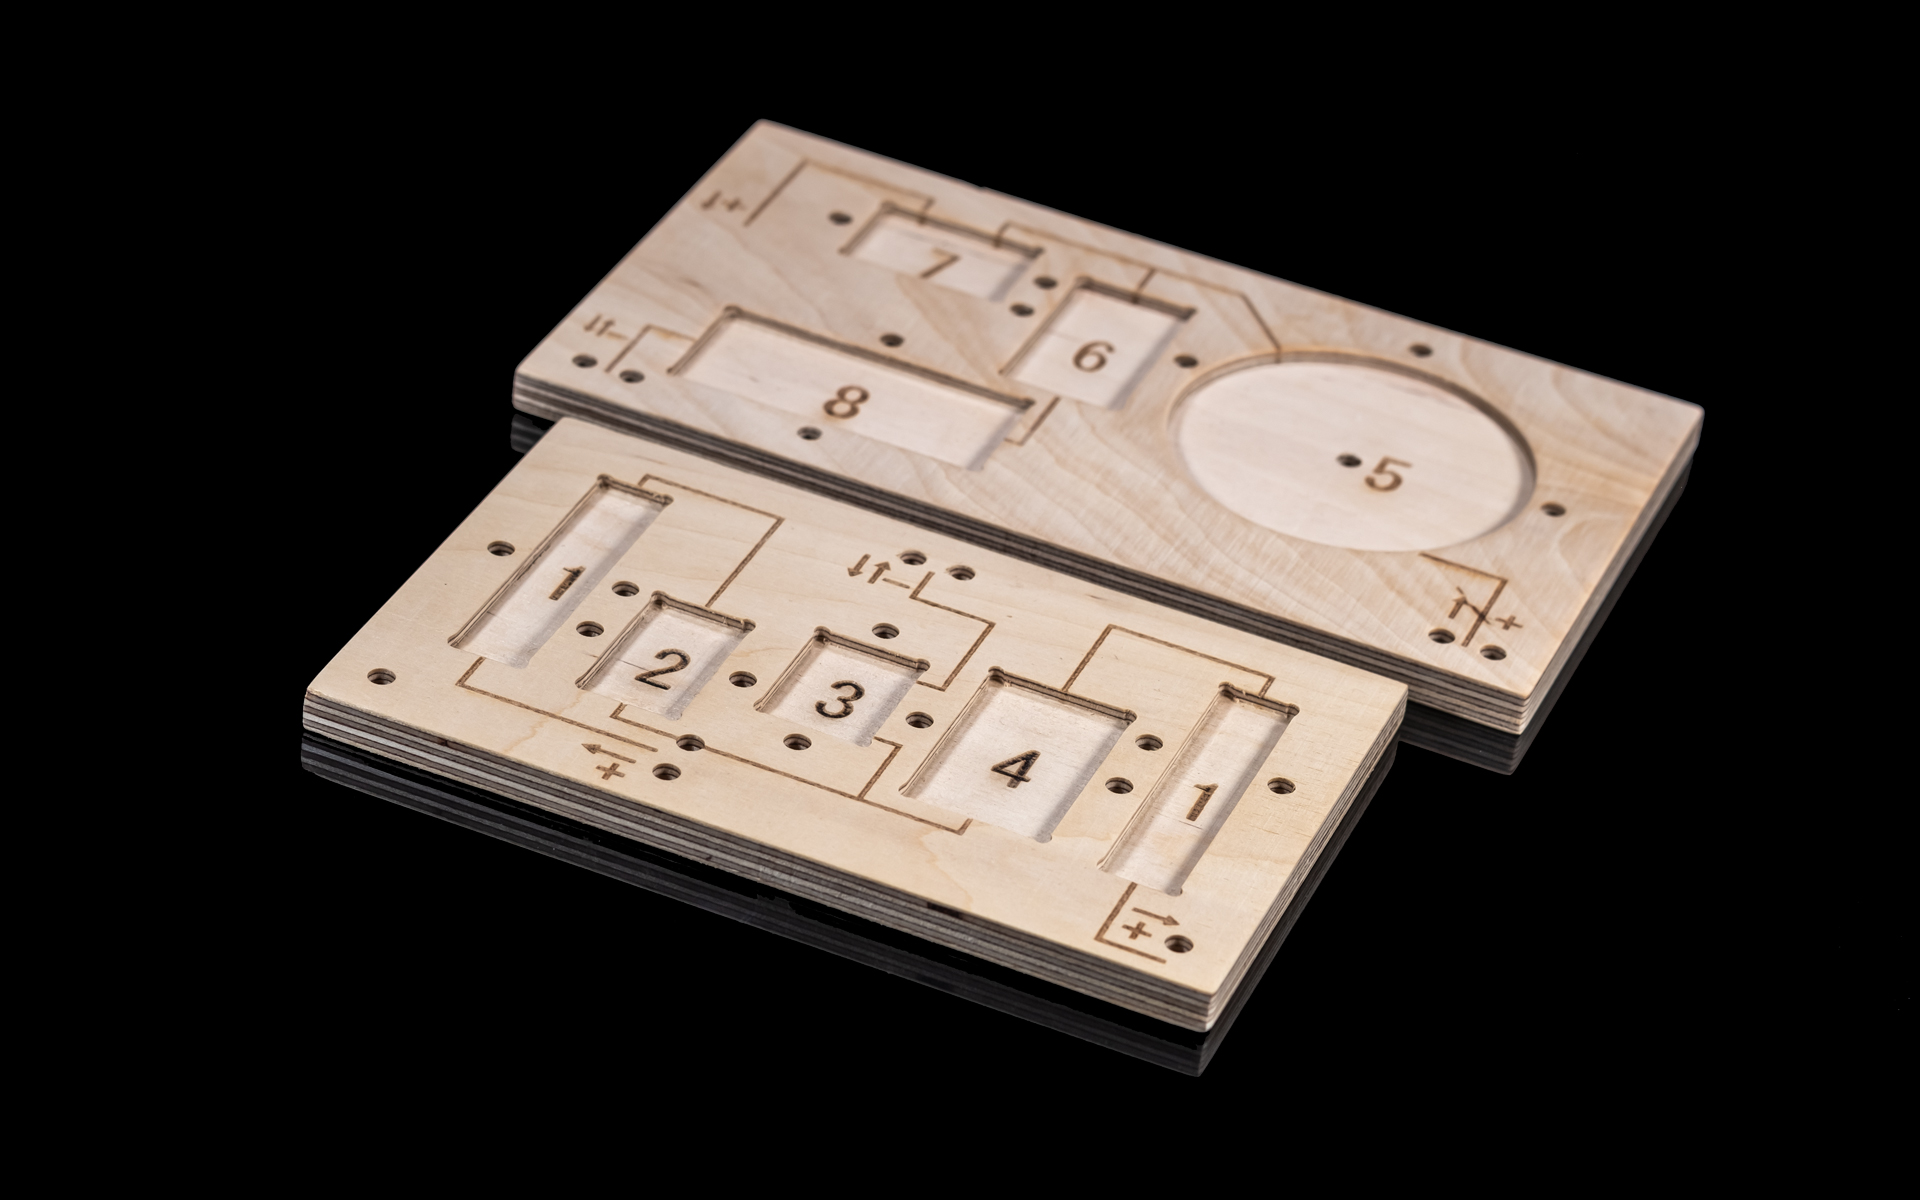 DIY Sound Light is a ported 2-way design that measures (H x W x D) 424 x 204 x 303mm and weighs 17.5kg. Further specs list one of each a 6.5” mid/woofer and 1” dome tweeter, crossover parts exclusively by Mundorf, crossover point set at 2’000Hz, 89dB sensitivity, 40 – 20’000 frequency response, 4Ω nominal impedance, 110dB peak output and 100W power handling. Light is topologically a fairly standard monitor with nothing intriguing going on, which is hardly a con given its price point and purpose. It was designed with simplicity in mind, so professional speaker builders won’t find it any innovative or complex. It wasn’t meant for them anyway. Meanwhile, the target audience will have their hands full. The reality is that even the simplest speaker is not as straightforward to put together as it seems, especially if we haven’t done that before. Luckily the manufacturer’s tutorial PDF shows the way in the good ol’ step-by-step fashion. All the how-to photos and descriptions are there. The final result however will heavily rely on one’s attention to details. I believe that this is what makes the difference at the end. On that note, I figured that if I’m to build today’s kit on my own, showing it at various completion stages and explaining them seemed a useful thing to do.
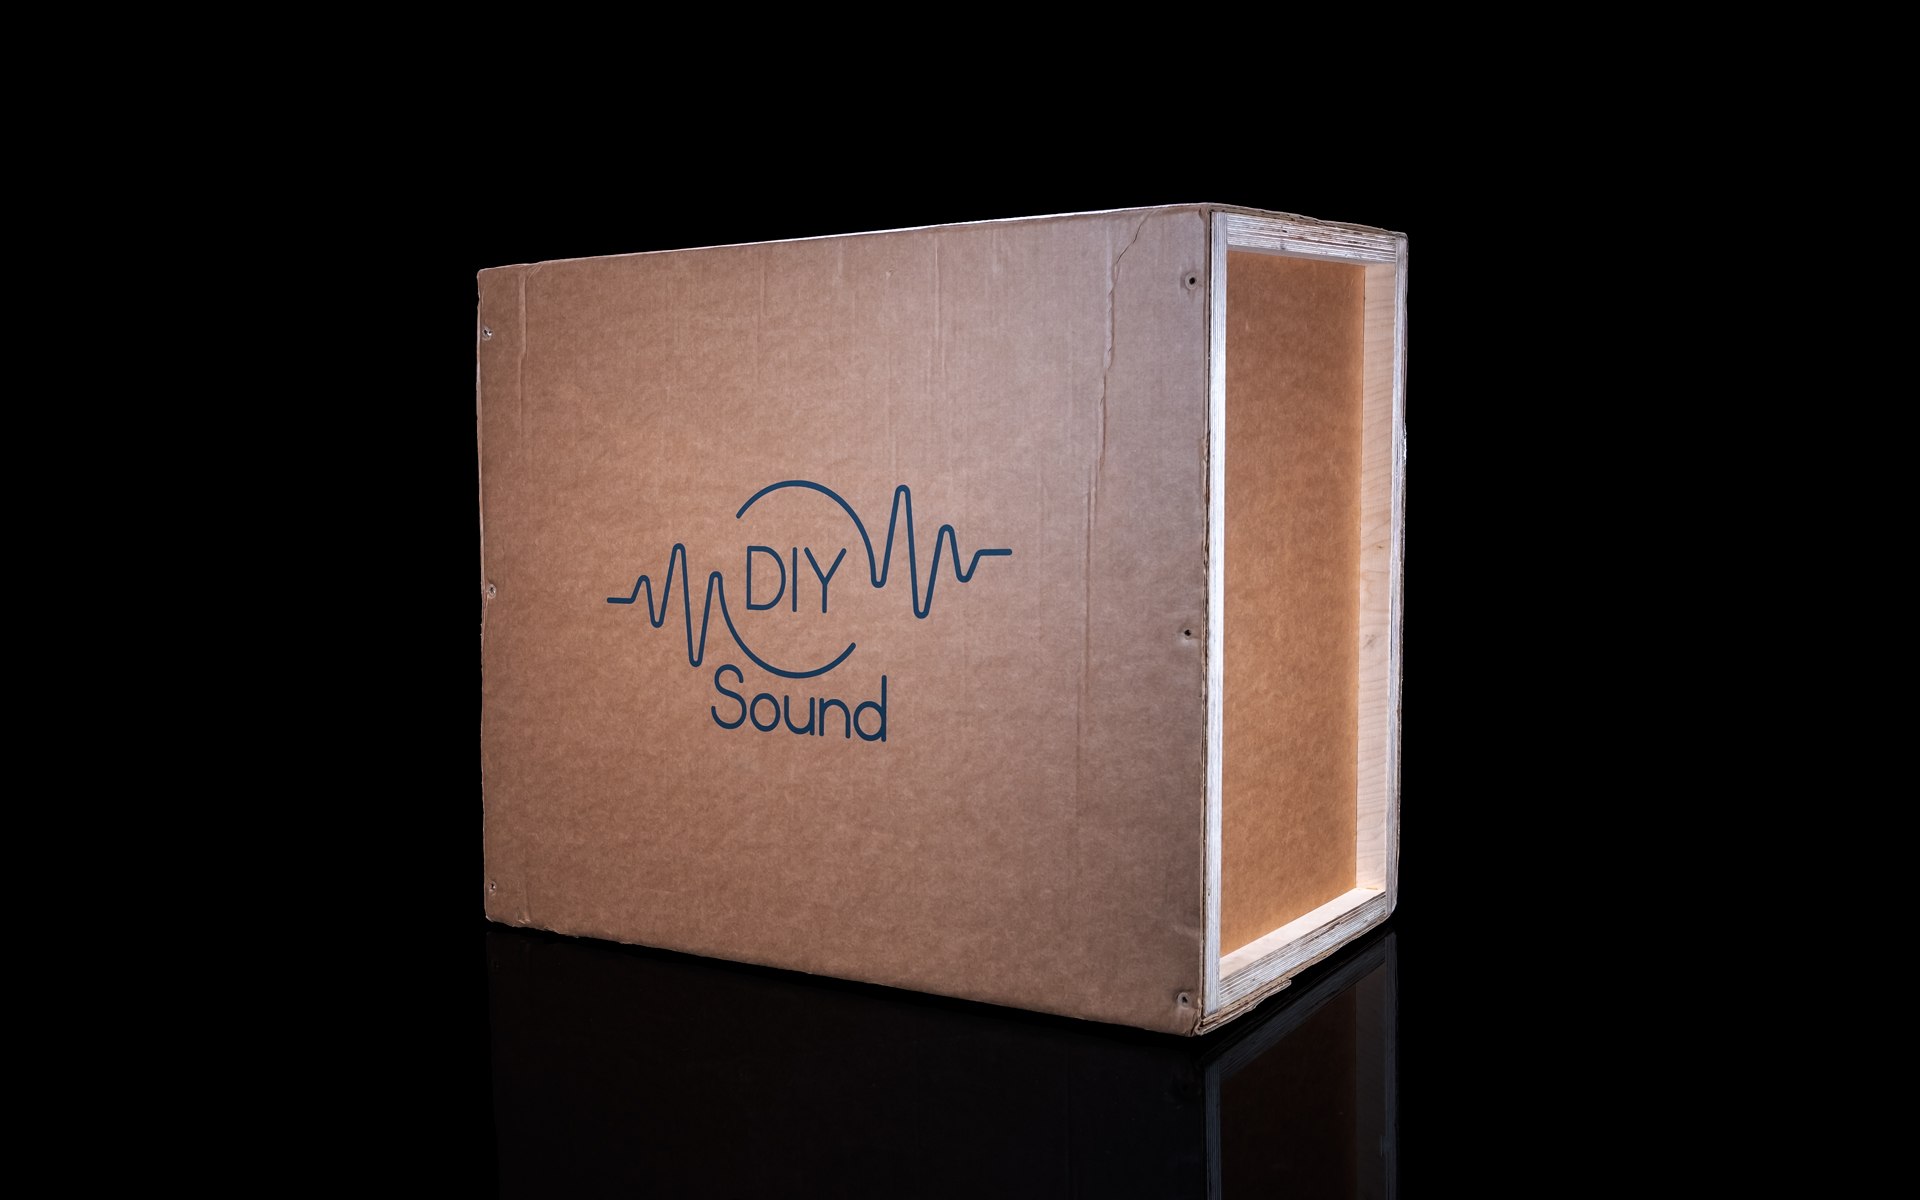
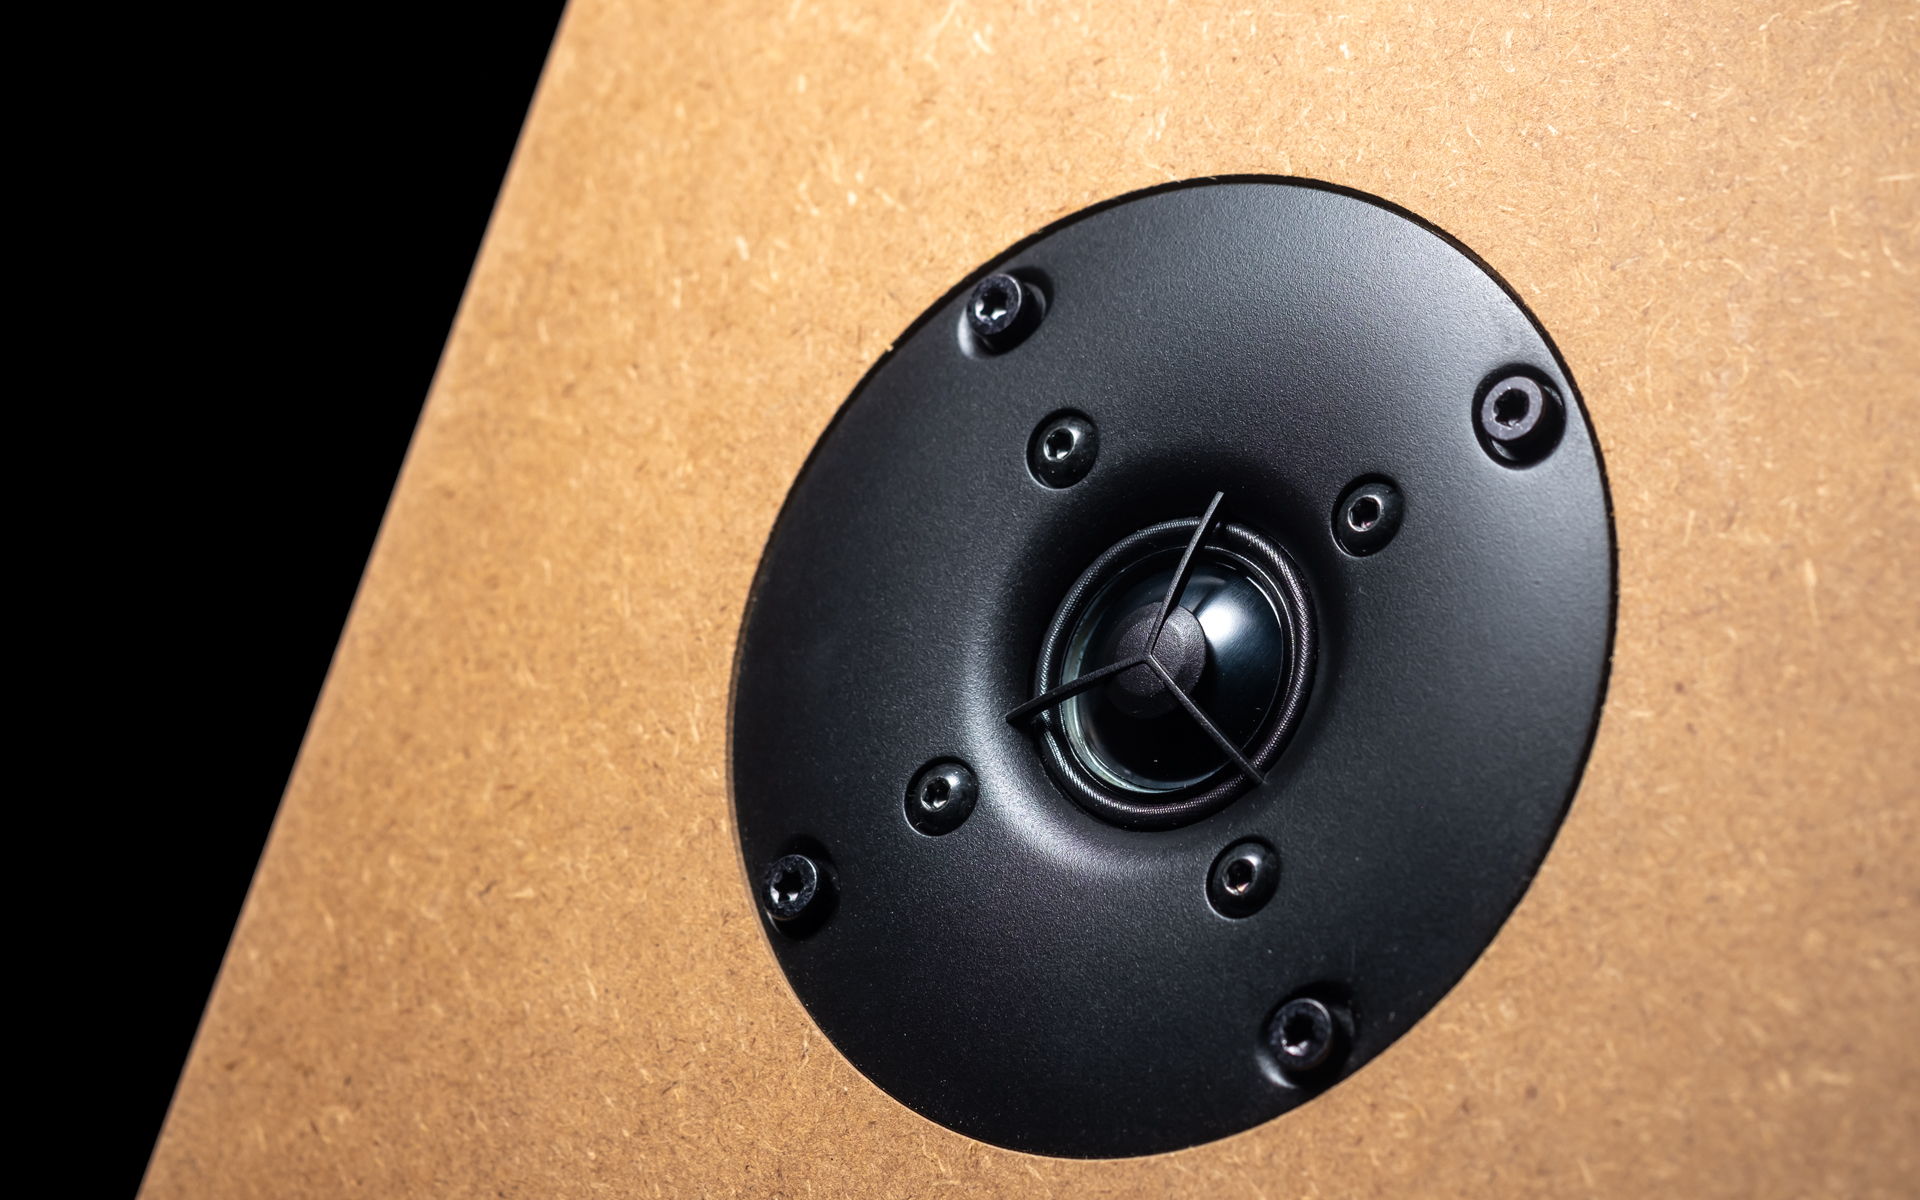
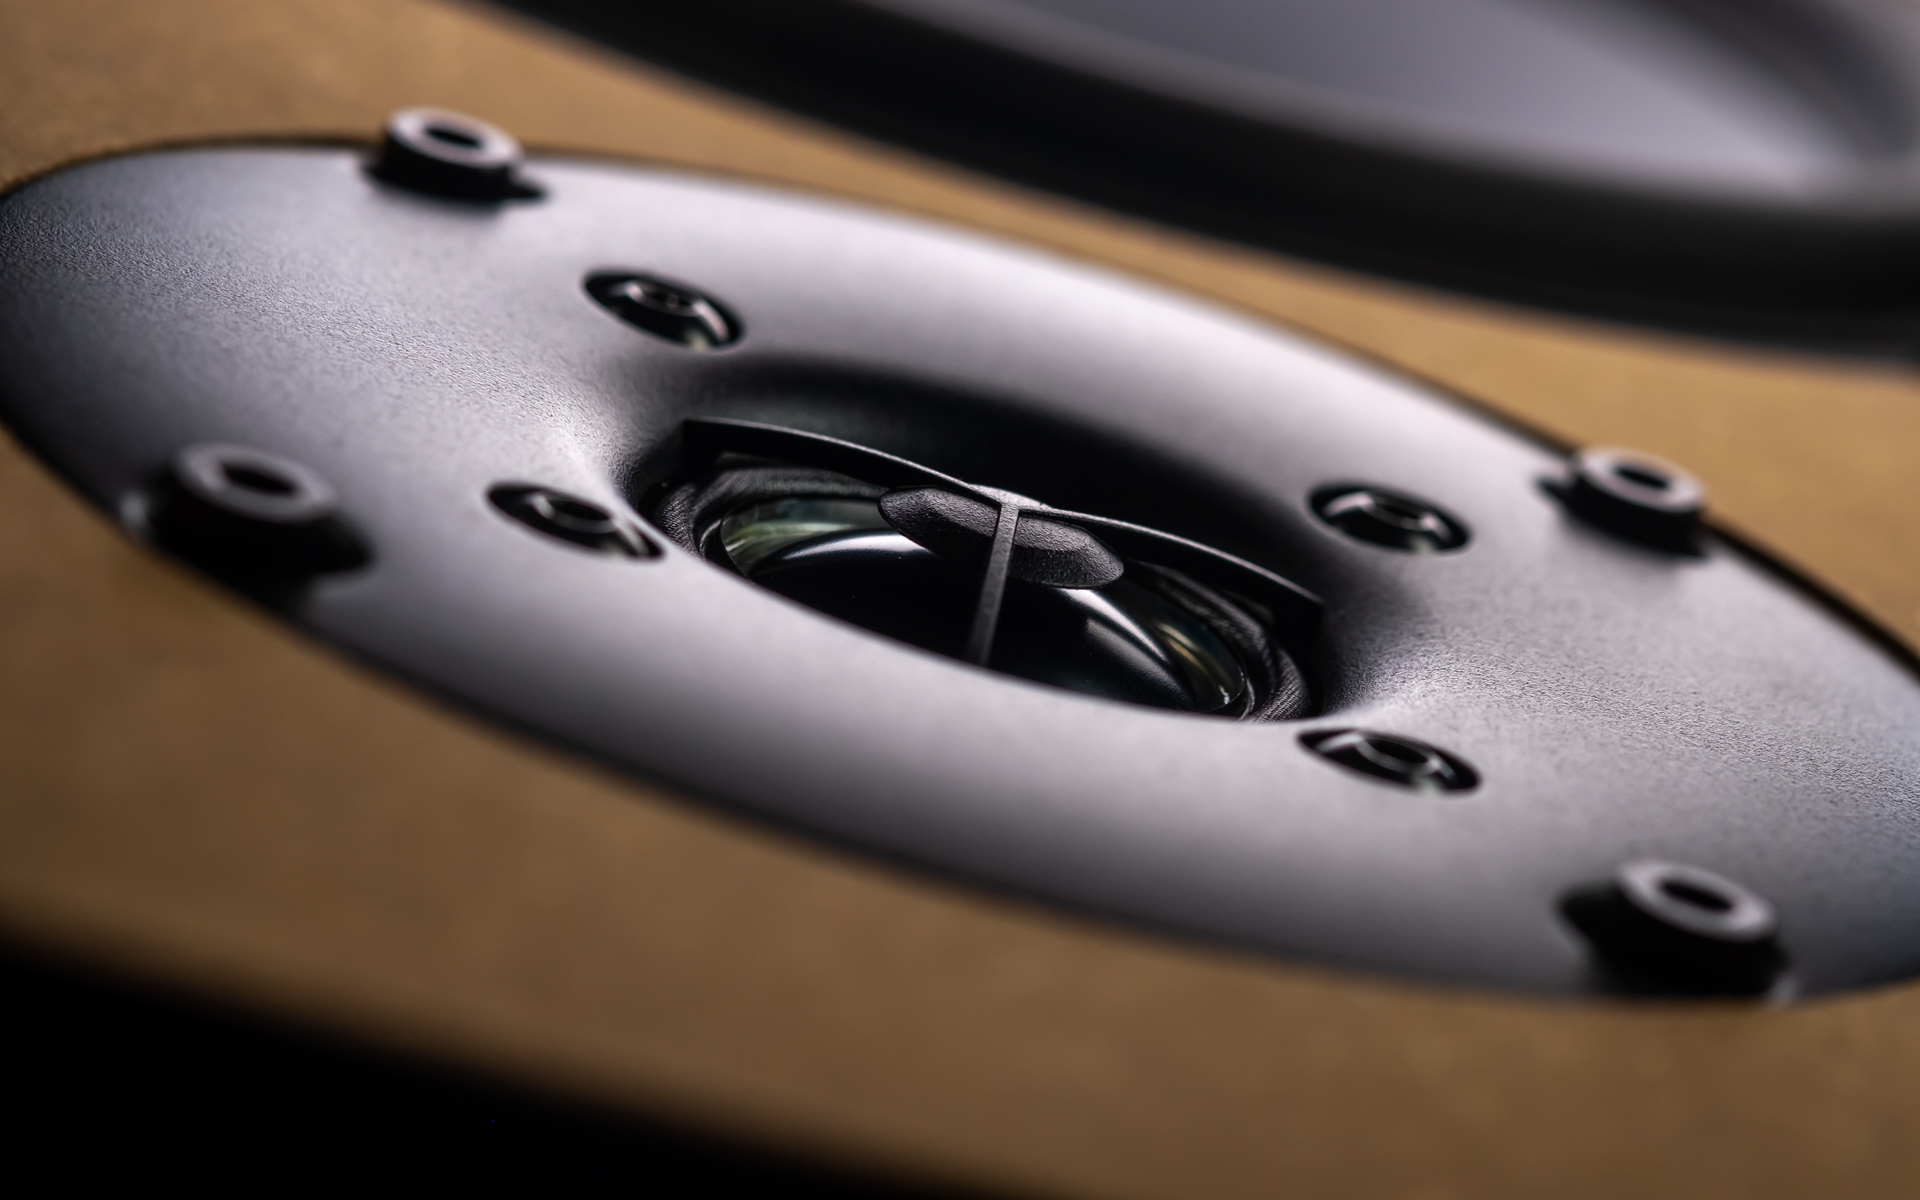
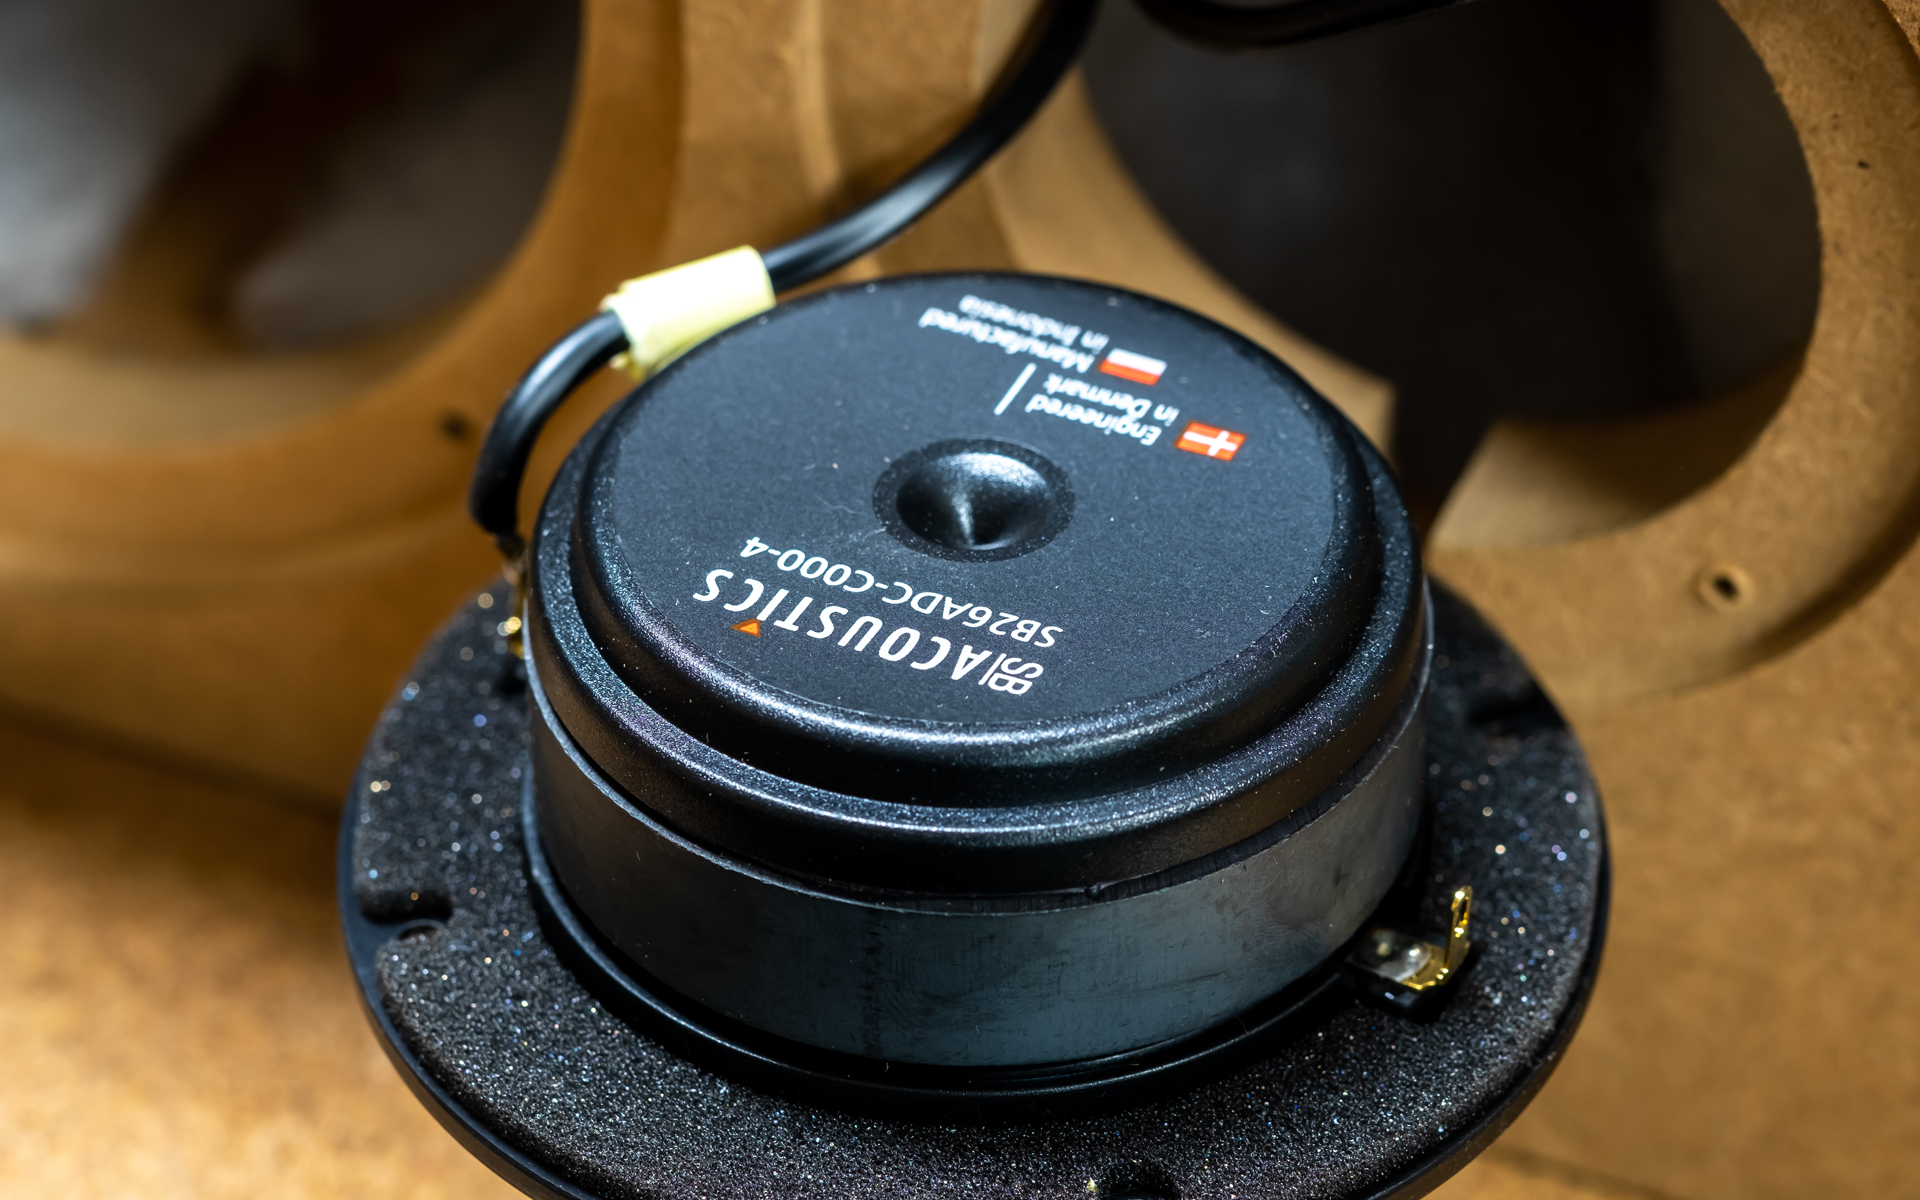
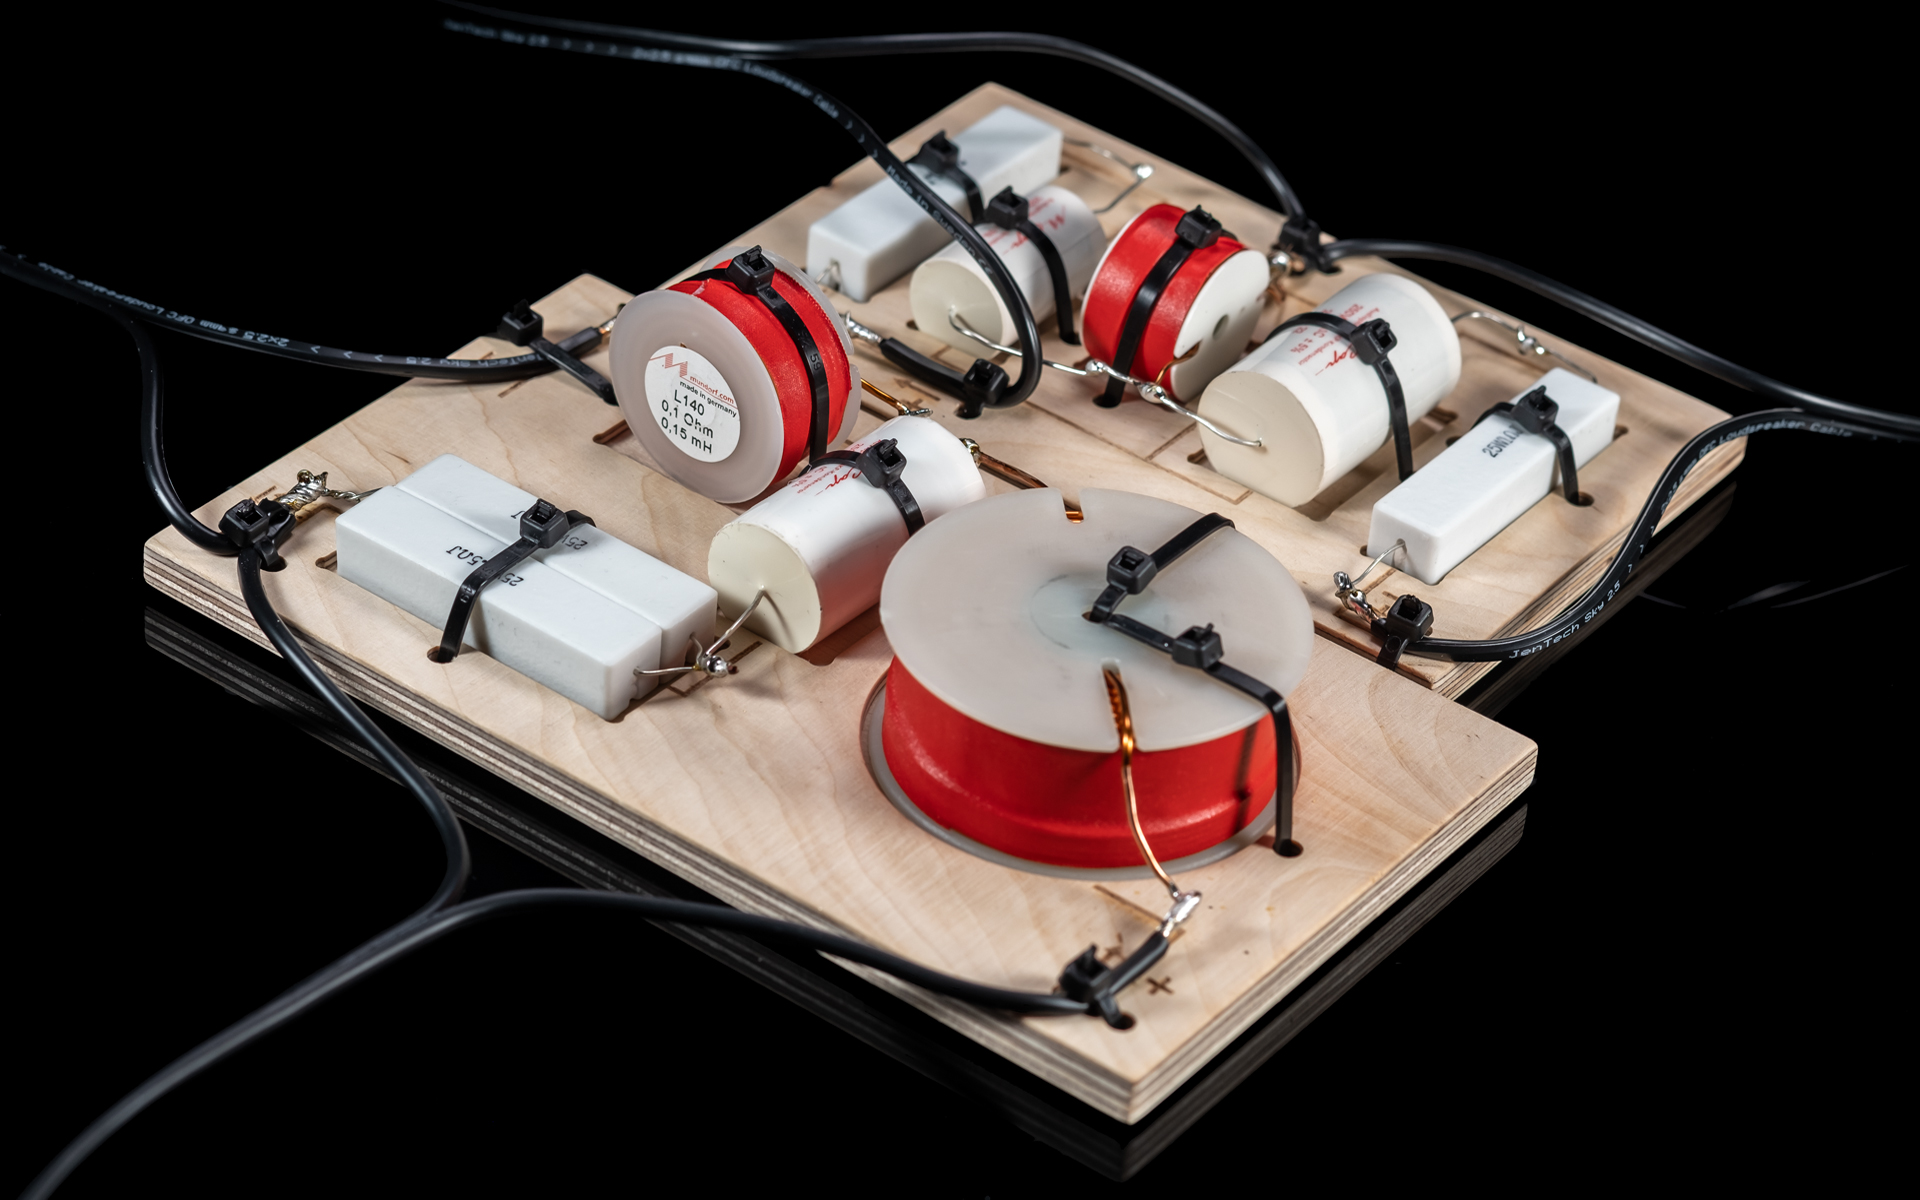 Let’s first list the contents of this report’s €899 package. It arrives in the form of a massive cardboard crate reinforced with wooden braces on both sides. Undo eight pointy bolts and the main cover pops off to reveal the foamy interior split into two floors. The upper deck busy with several segments stores all the small parts; crossover caps, resistors and coils, drivers (SB Acoustics SB26ADC-C000-4 tweeters and SB17MFC35-4 mid/woofers), glue sticks, cable ties, pre-soldered internal wiring cuts, a large bottle of PVC glue with a brush, solder, sanding paper, damping wadding of various size and thickness, speaker posts, name plates and screws for them and drivers. The lower floor nests enclosure walls, tiny wooden dowels, internal braces, bass reflex tunnels and ply crossover boards ready to accept their parts. A soldering iron, glue gun, tweezers, rubber hammer, sharp knife and at least two woodworking clamps form the list of useful if not mandatory tools, which understandably aren’t included in the set. Should you wish to buy them, where I live they’re about €60 in total. A sanding machine is a big plus, but not mandatory. A regular 180-grit sanding paper sheet included in the set easily did its part on HDF boards which make today’s enclosures. A nice t-shirt with the DIY Sound logo was found in the box, too.
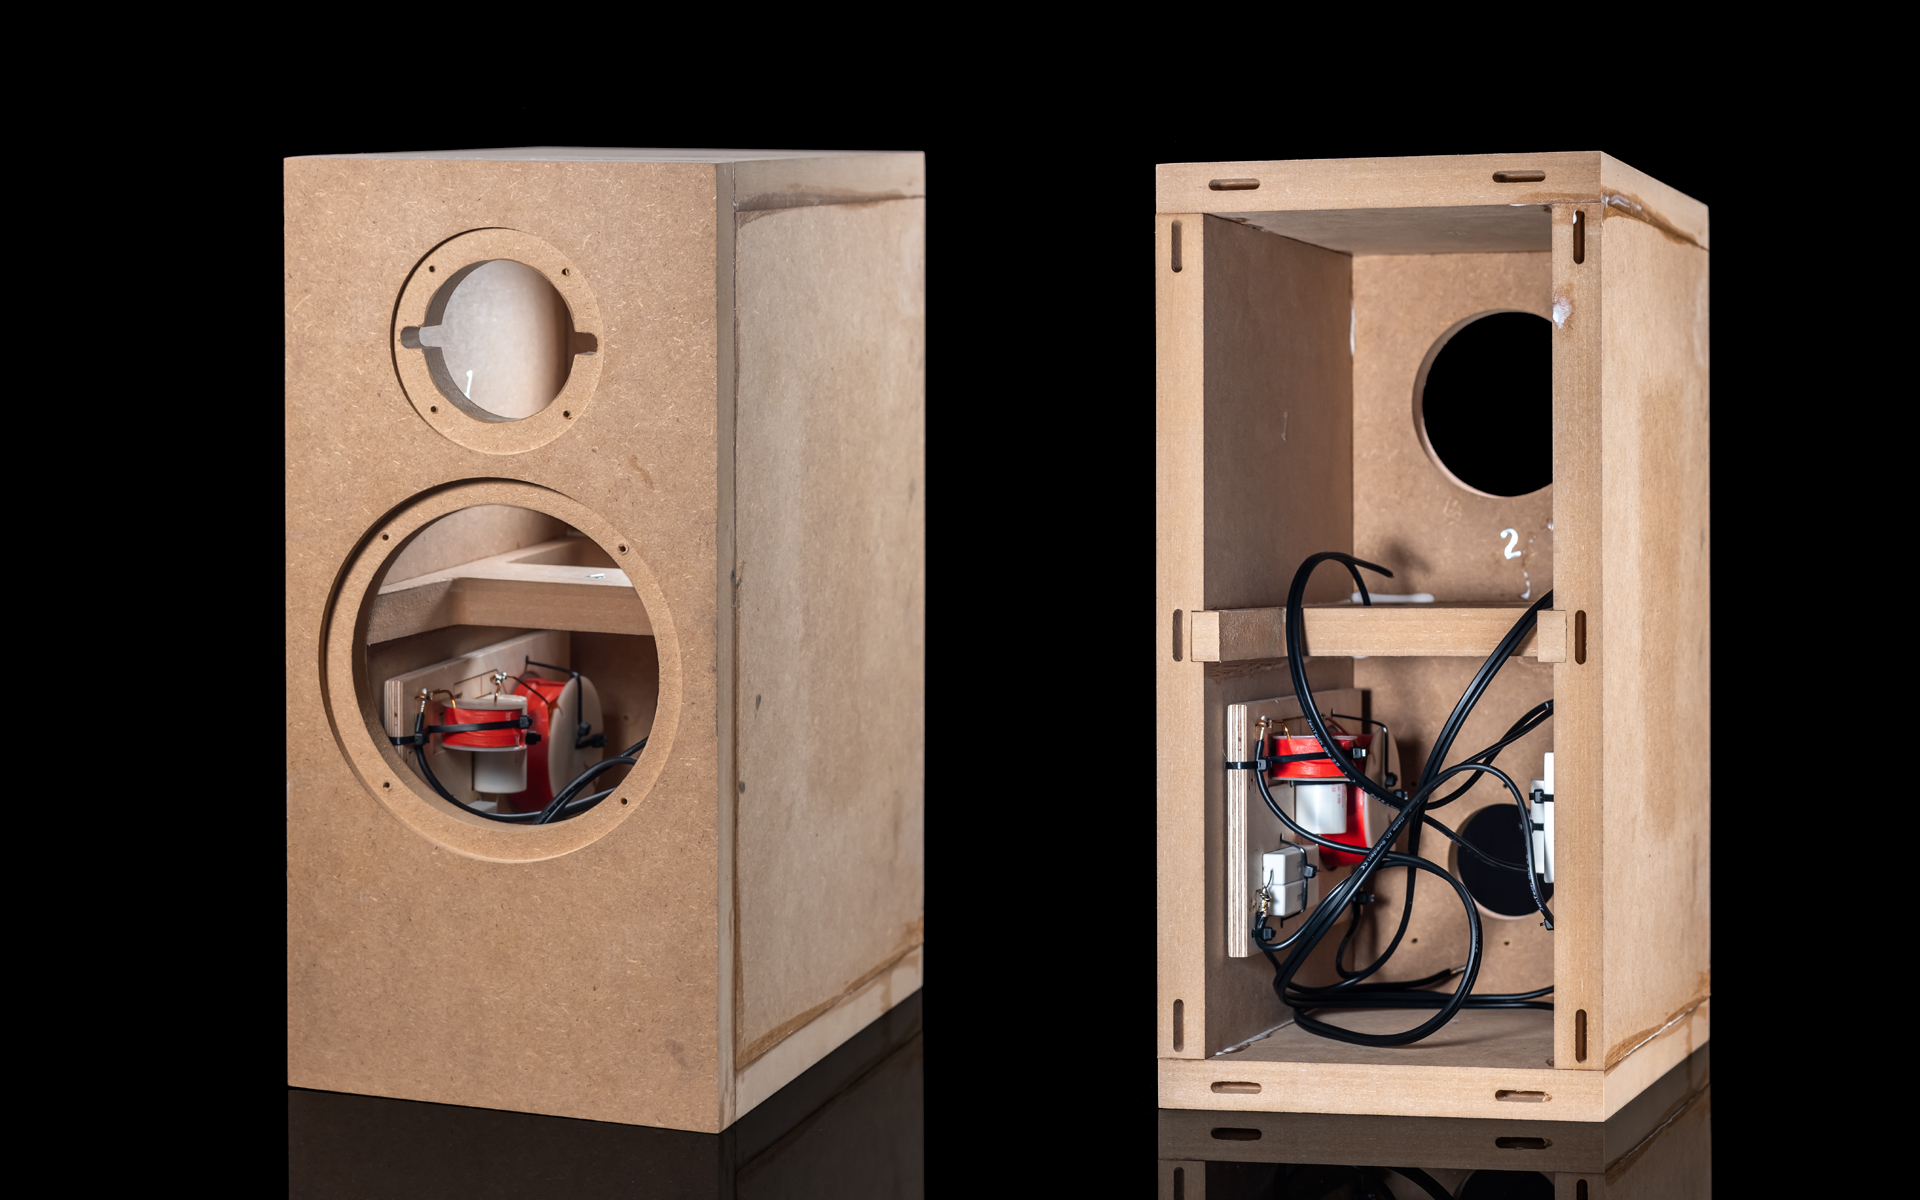 The manufacturer’s thorough guide has all the details how to build the Light kit from start to finish. It honestly leaves no room for guessing. First we assemble two ply crossover boards for each speaker, which means that its tweeter and mid/woofer see their own filtering networks. Their numbered and pre-cut sections accept coils, caps and resistors, all conveniently packed inside their own bags with the corresponding numbers. If we pay attention, the odds of installing a component not where it’s supposed to go are second to none. Each listed part positioned in its designated spot firmly mounts to the rectangular crossover board via a cable tie that goes through the nearby twin openings. Clear markings on these bases show how their components connect one to another and also to the internal wiring. Solder secures all these bonds.
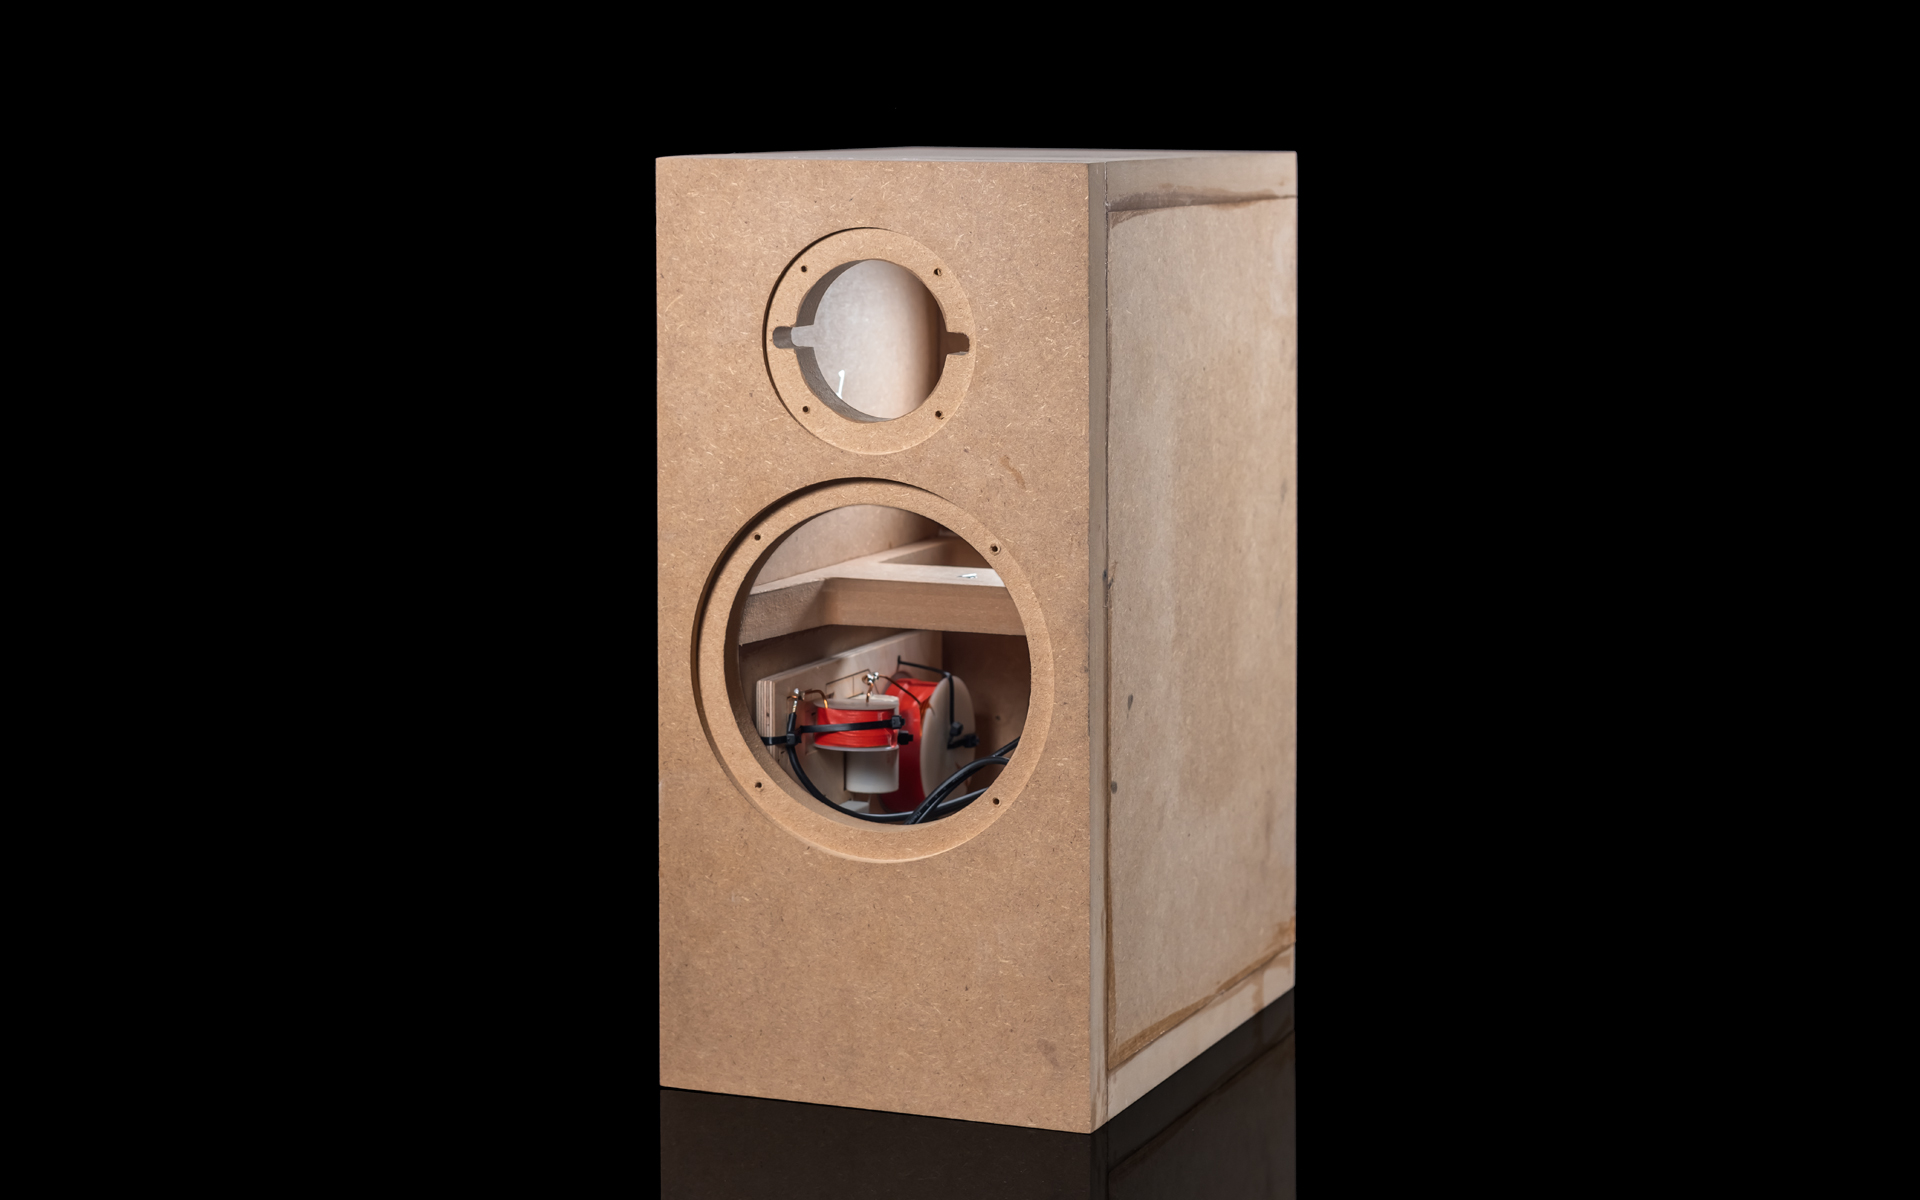
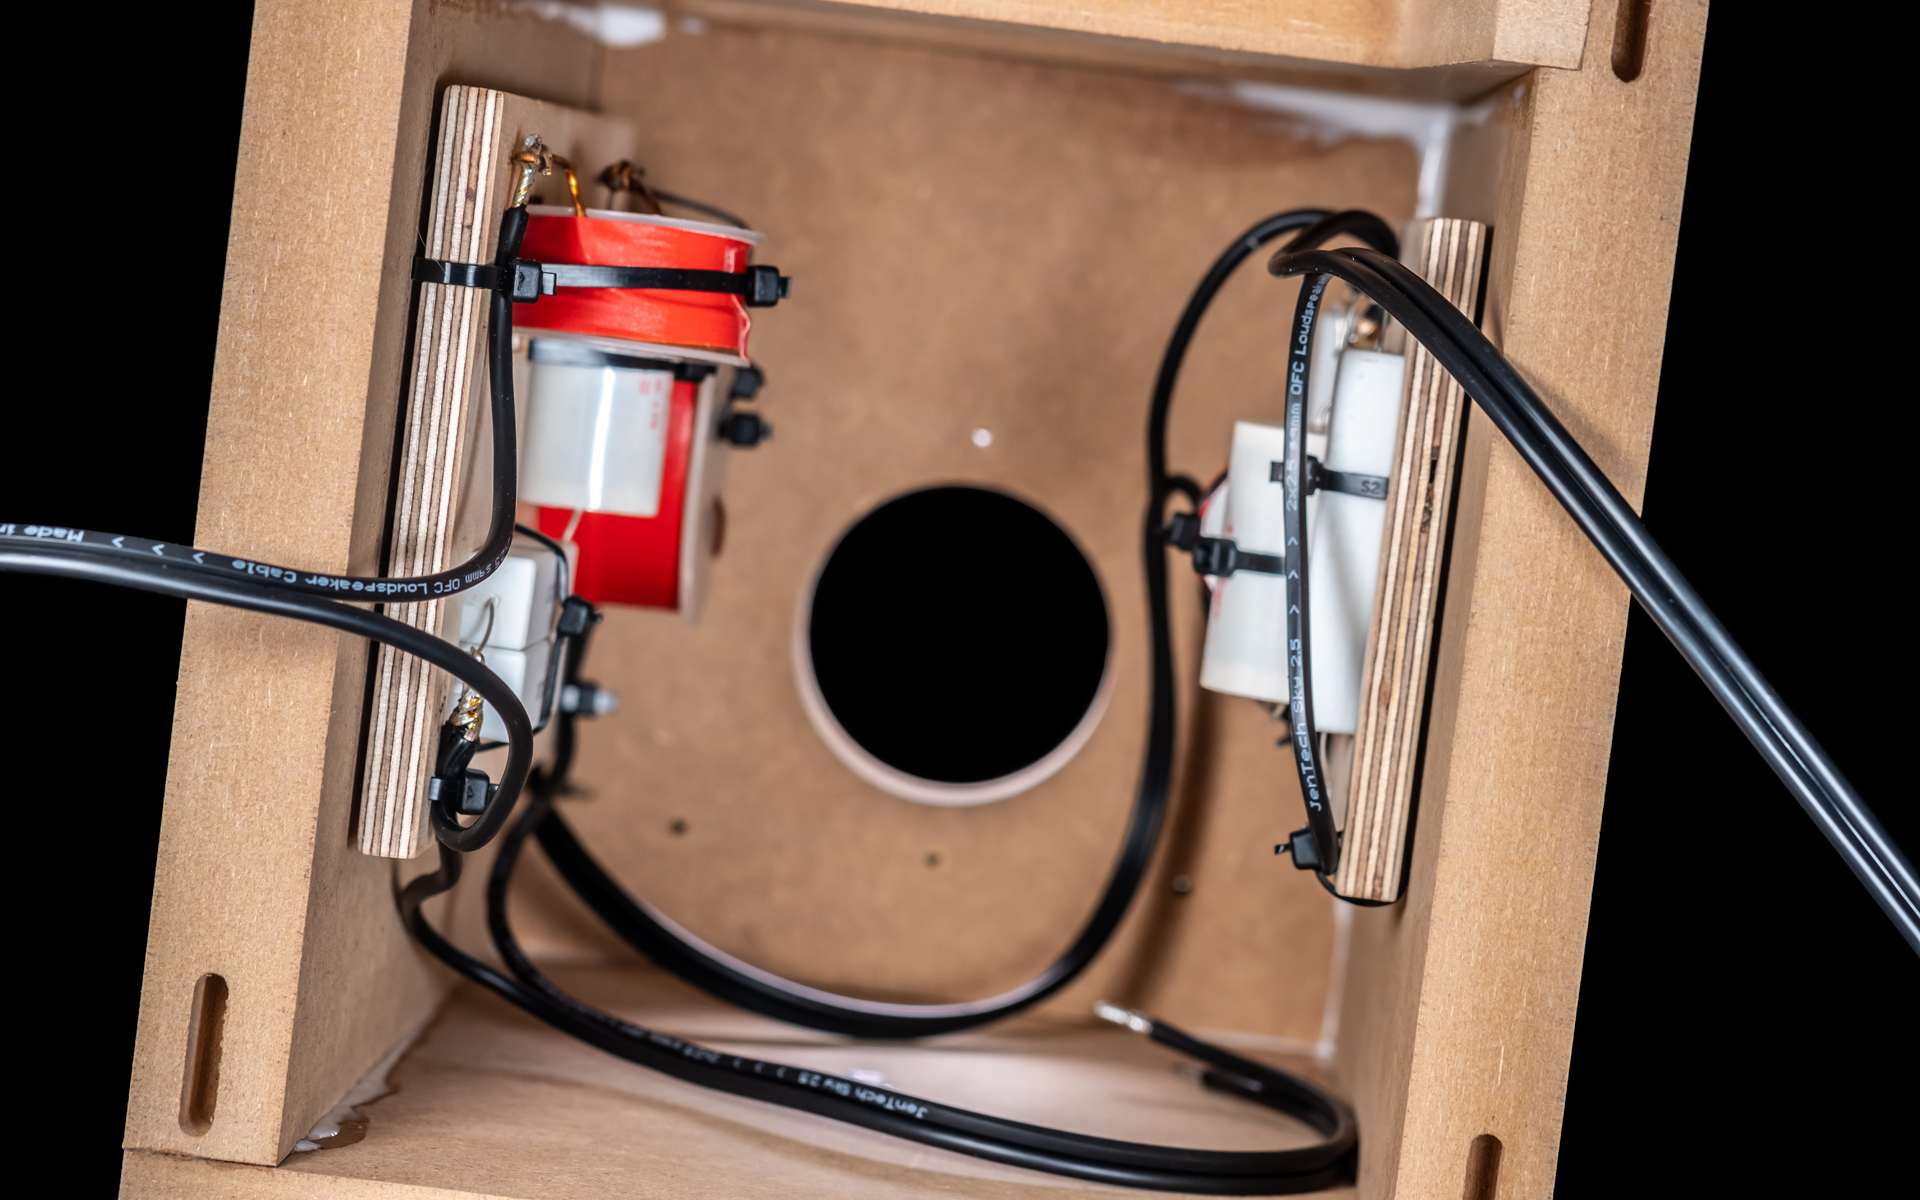 Once the crossovers with the attached cables are done, hot glue fixes them to the speaker’s side walls near the base level. Then a generous amount of the PVC glue goes onto the rear edges of these panels and in all the dowel holes in that area. The cabinet’s rear with openings for a bass-reflex tunnel and name plate gets the same treatment plus dowels in its own holes. Once everything’s done as specified, all three enclosure pieces can combine. Here woodworking clamps become extremely useful in squeezing out excess glue, firmly bonding the elements and securing their tight fit. In the meantime we apply glue to the internal brace and slide it right into the middle of the enclosure, which during the next assembly steps develops its top, bottom and forehead. Here mounting these panels one by one and clamping each to the main structure is highly advised. It goes without saying that the cabinet mustn’t have any small gaps between its walls to decompress as intended.
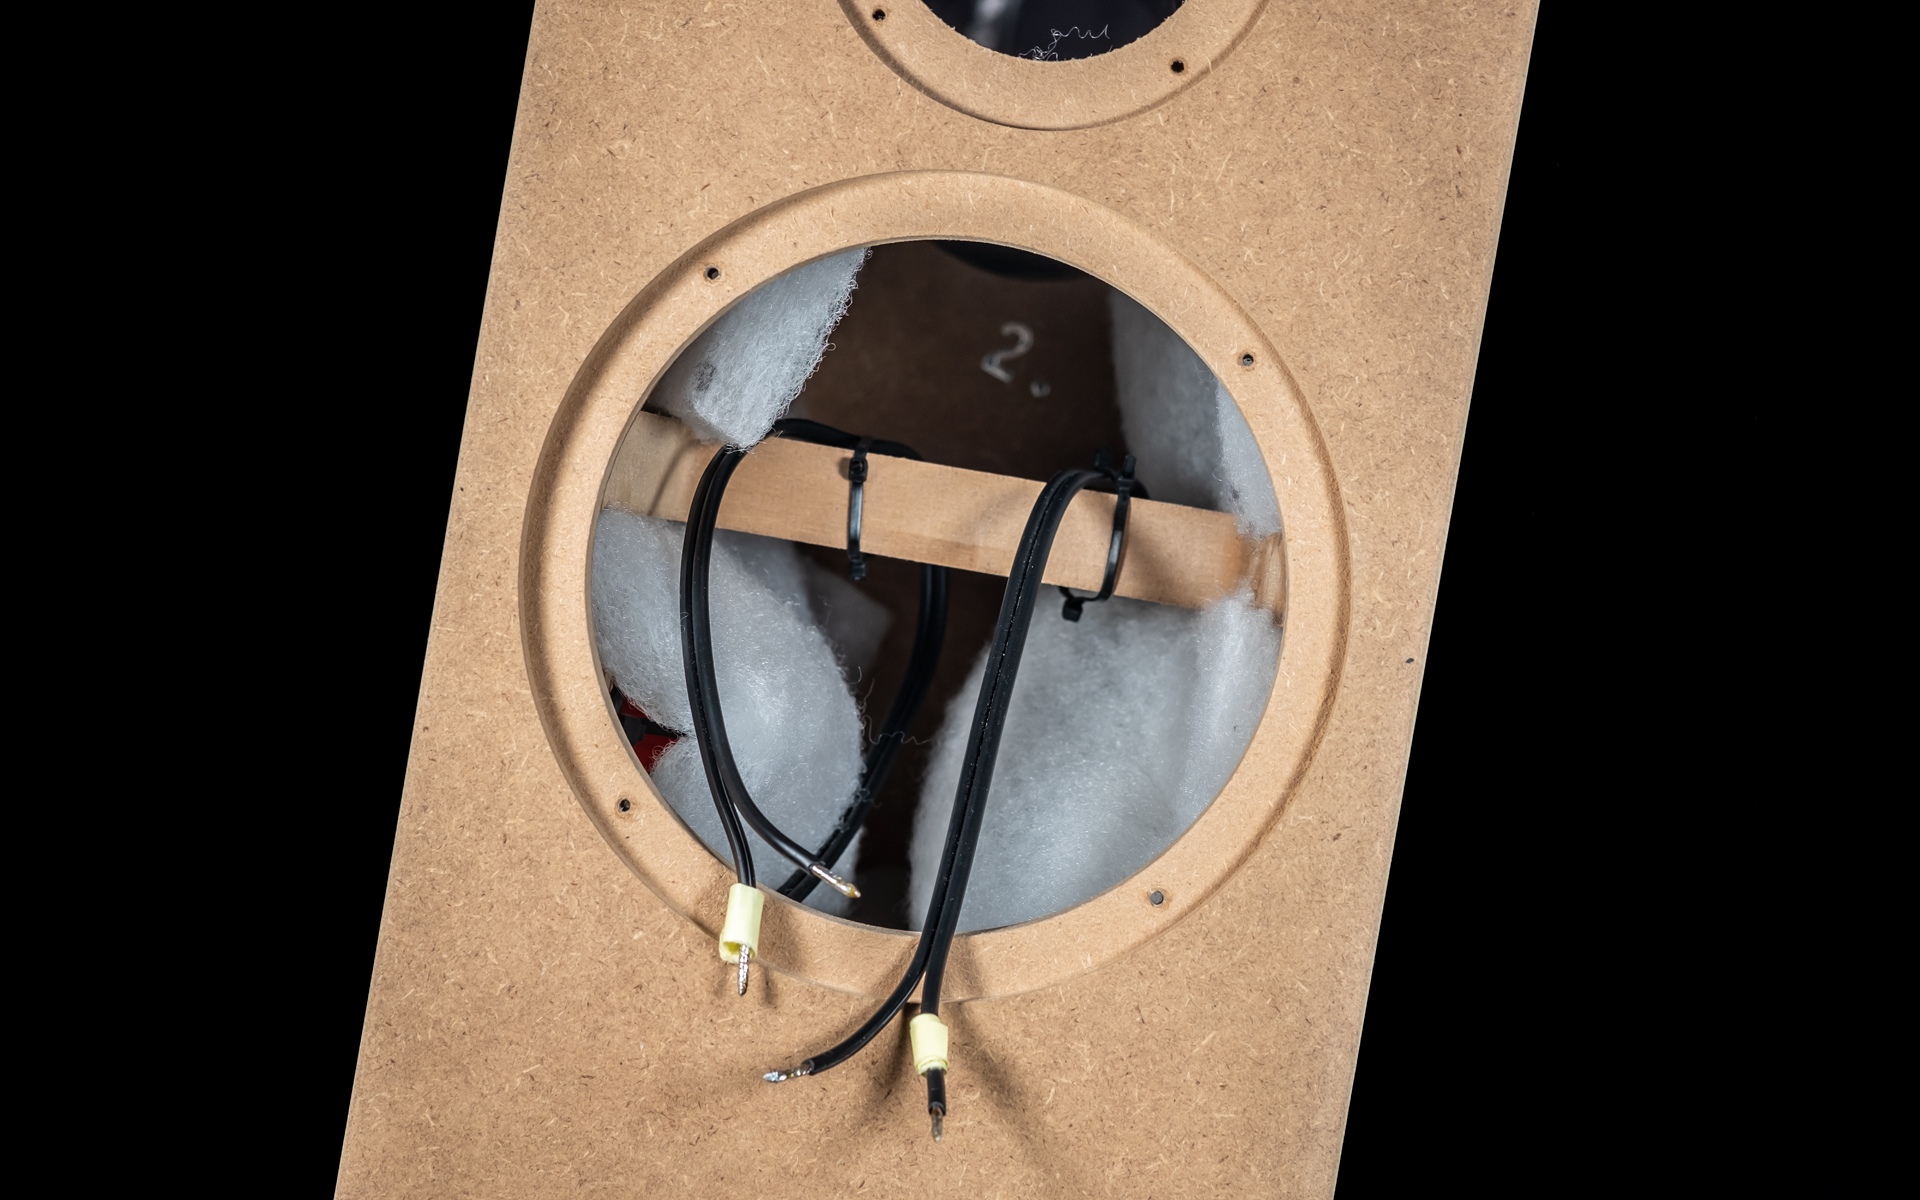
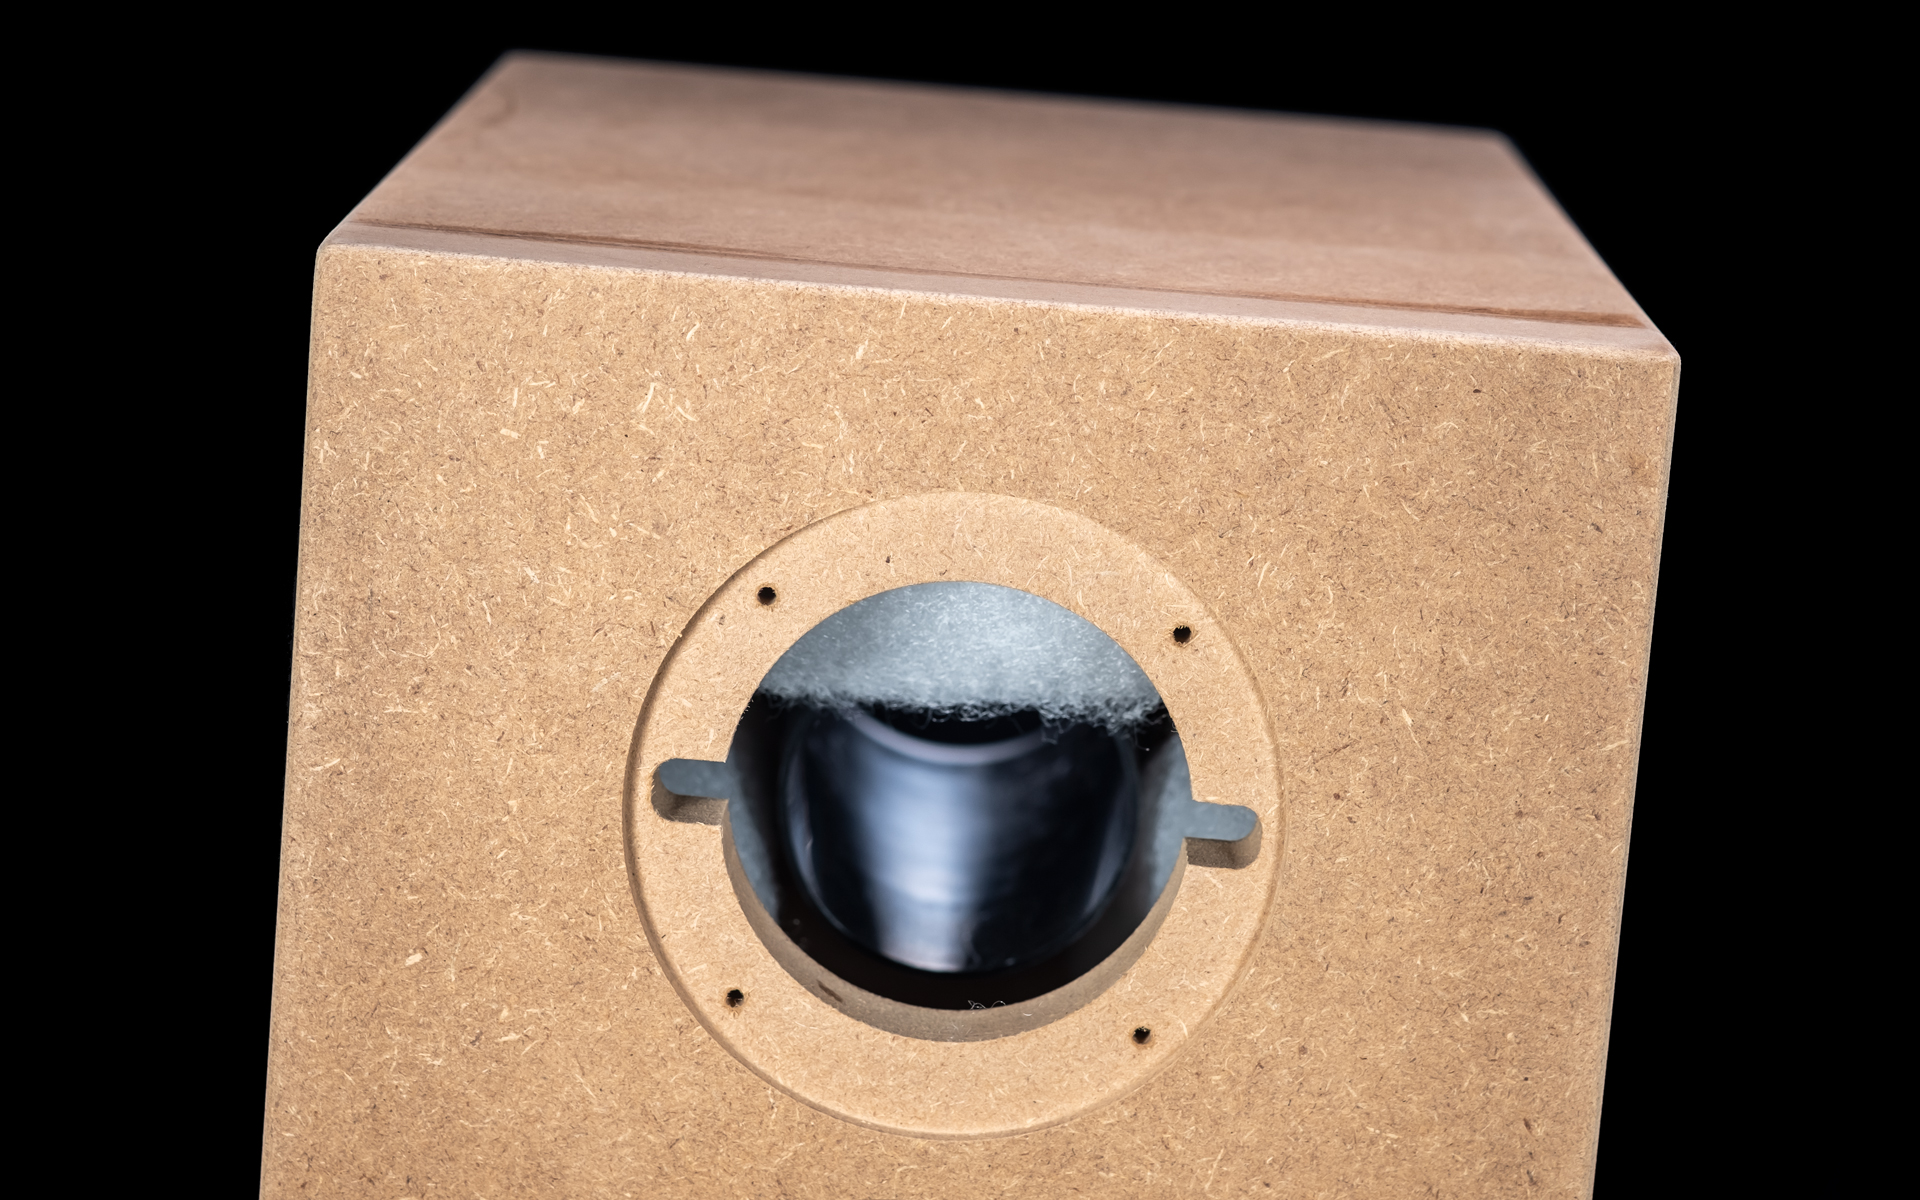
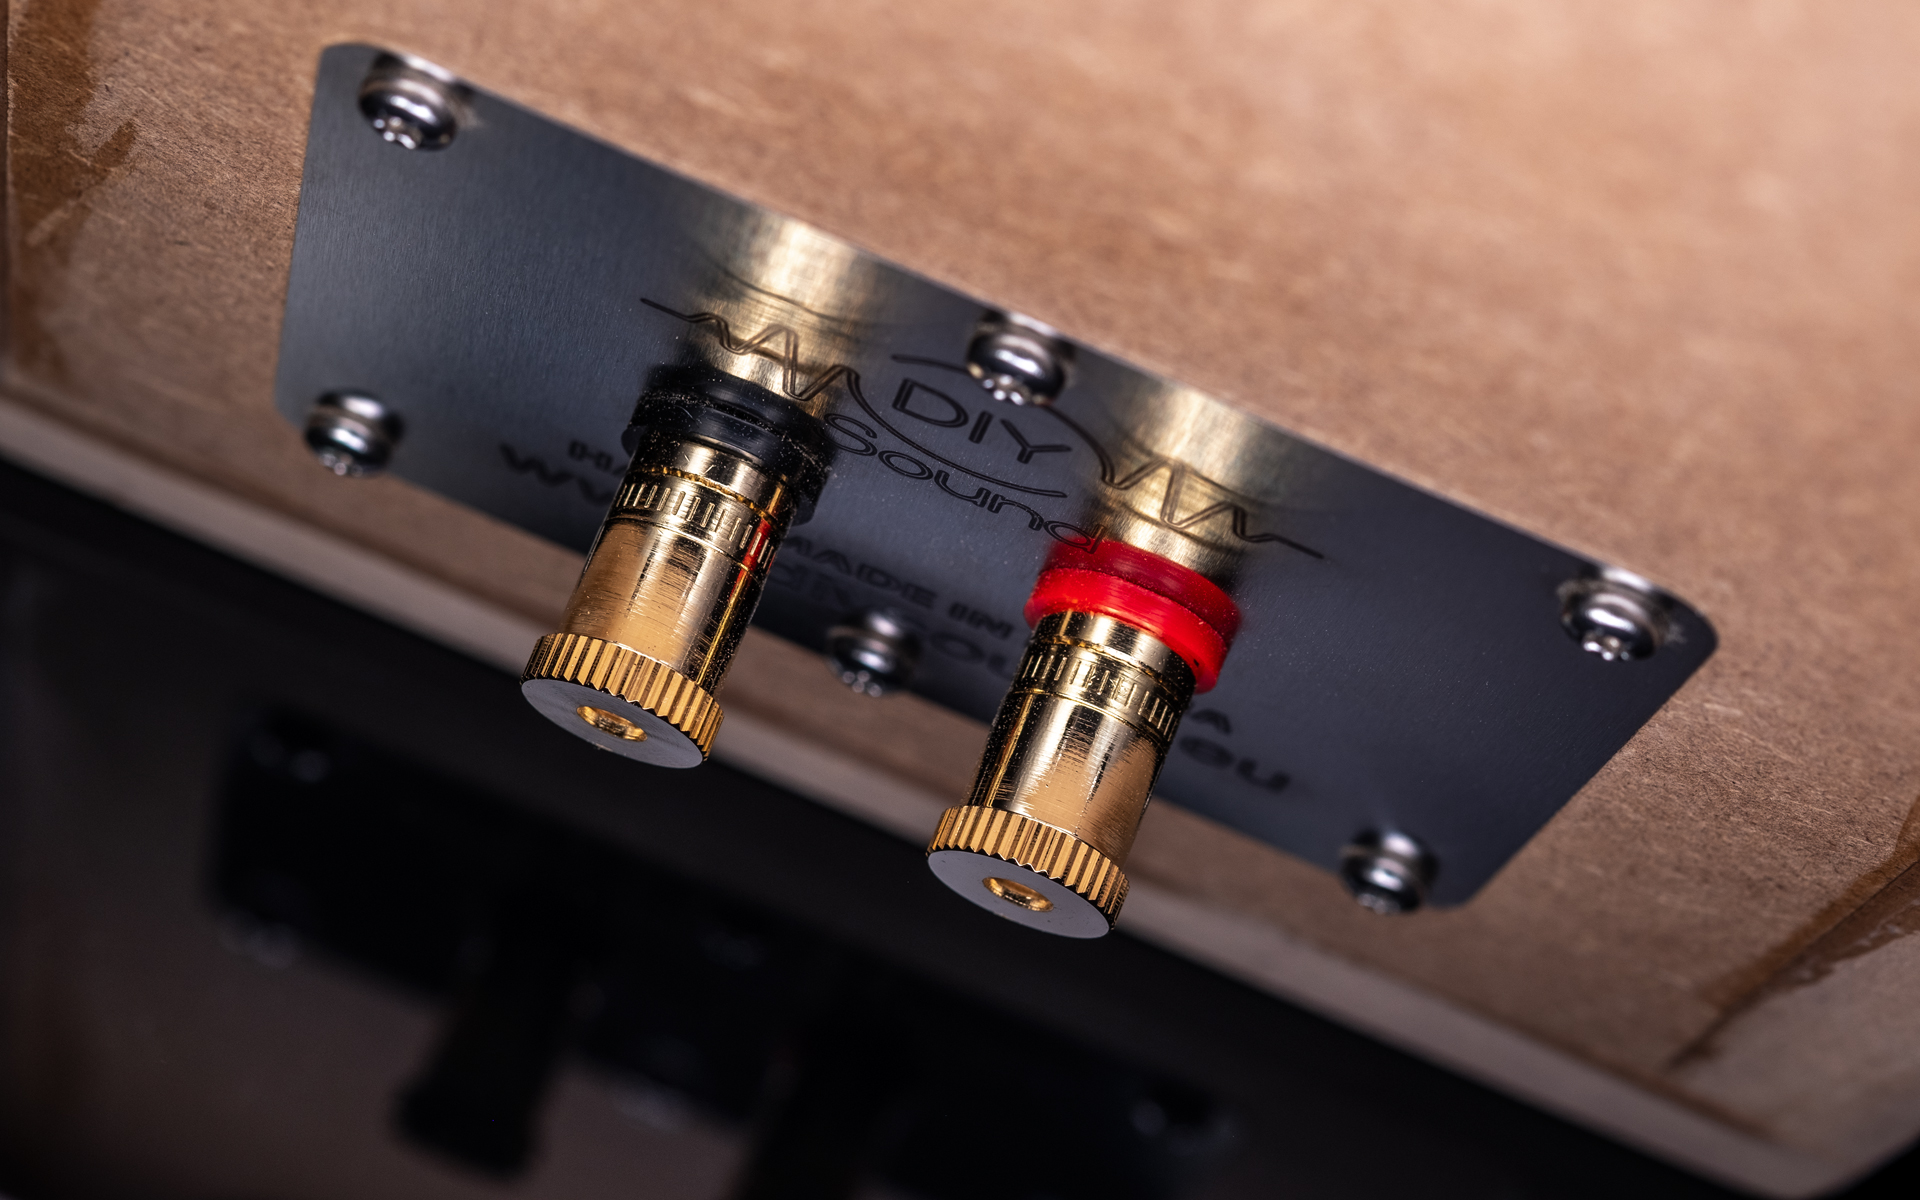
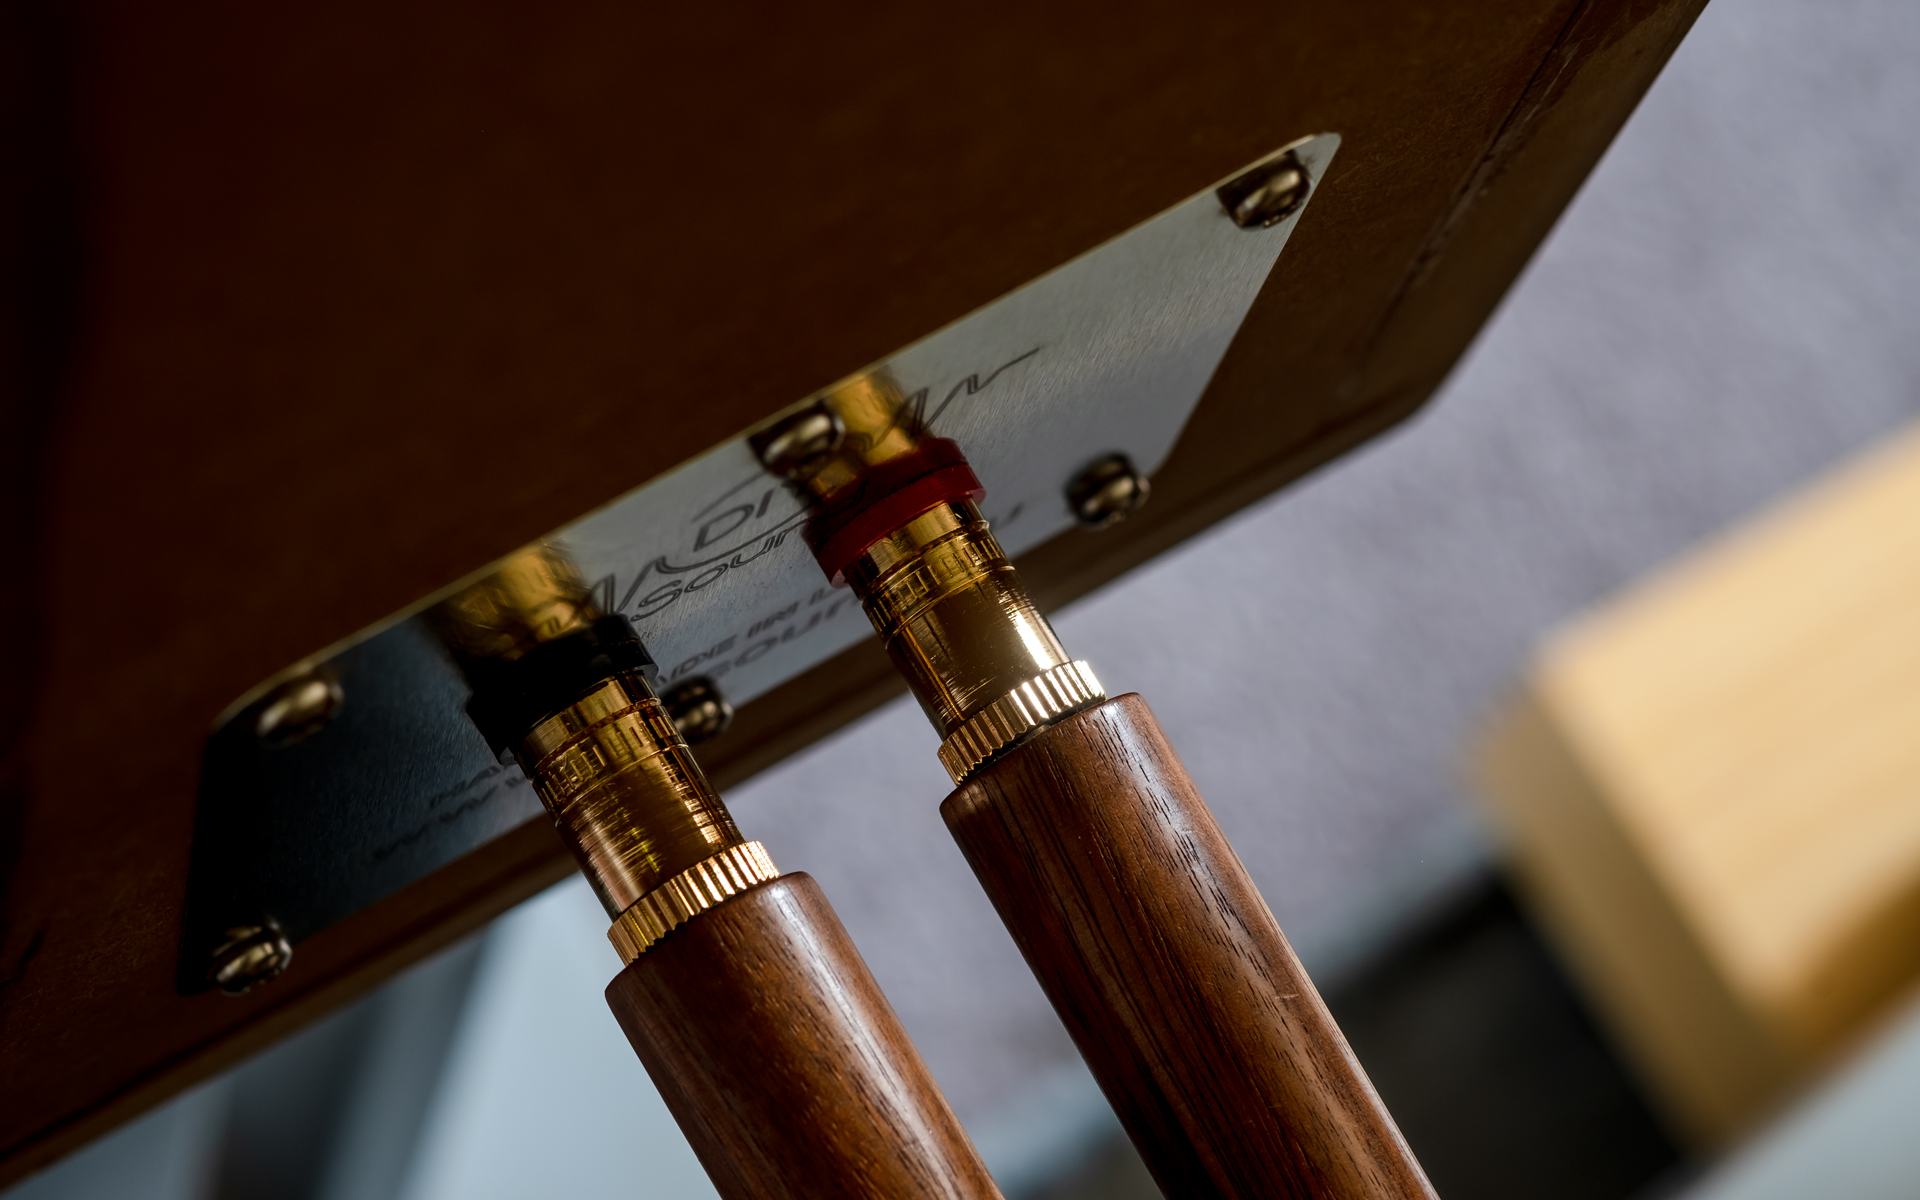
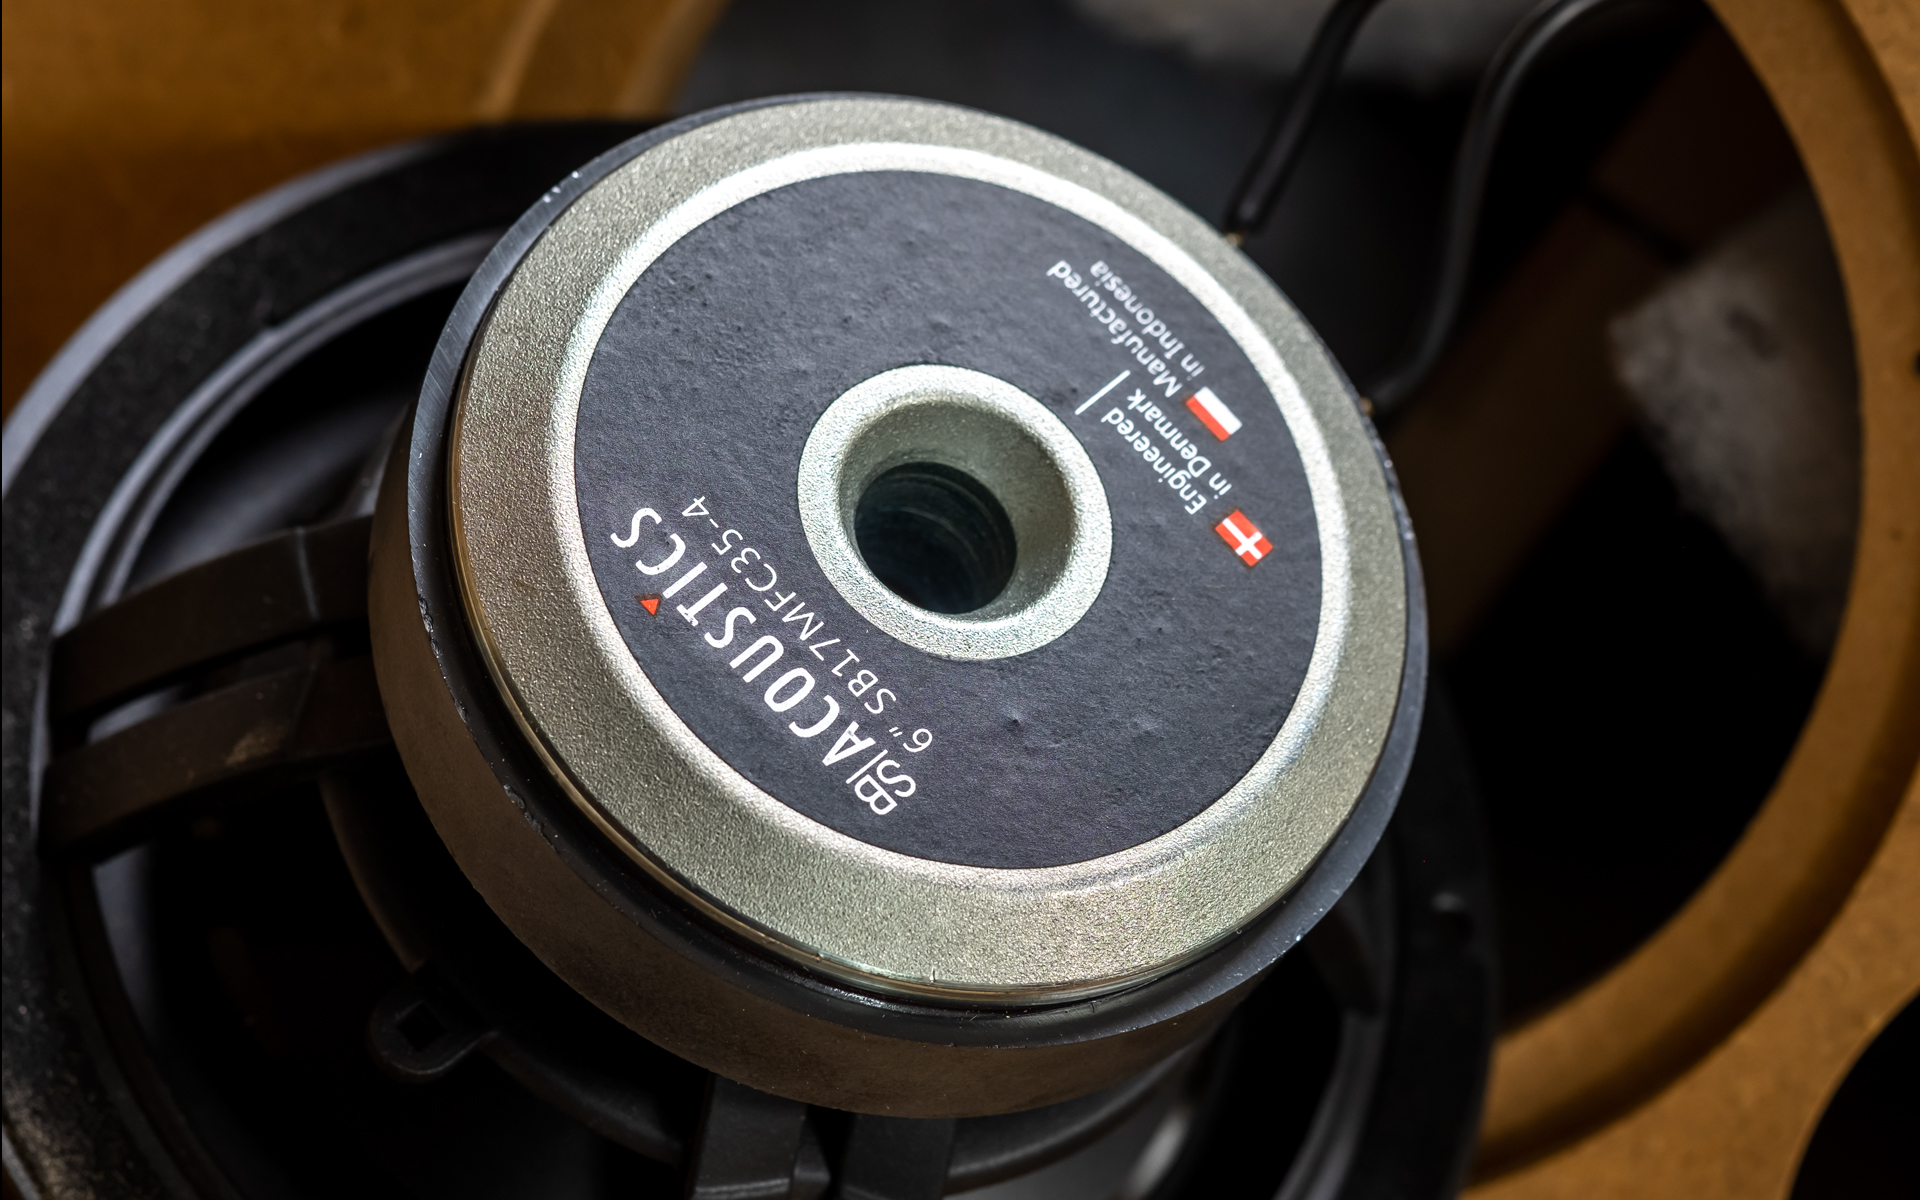 At this stage we have the enclosure ready for sanding in all the places where its walls aren’t leveled. Once that’s done, name plates get their binding posts which then solder to the wiring from the crossovers. A network for each driver features one input and one output cable pair. Positive input legs from both crossovers connect with the positive speaker post, negative runs solder to the other terminal and the name plate can bolt to the enclosure. Then we install the bass-reflex tunnel by just pressing it into the rear panel’s upper bore. If this pipe goes in too easily, one paper tape wrap just around its threading will do the trick. Afterwards we mark the ‘+’ and ‘-‘ output cables for drivers. Then we insert nine polyester wadding cuts inside the enclosure to strategically damp its top, bottom and cheeks. Next we solder output cables to the drivers, which can now bolt to the front panel. The DIY Sound sticker goes just below the mid/woofer and finally we can pat ourselves on the back. The job’s done, at least the half of it. The other speaker awaits. On the upside, it is built in the same exact way, so naturally much faster given all the practice we had with its predecessor. All in all, it took me about seven hours to have them both ready.
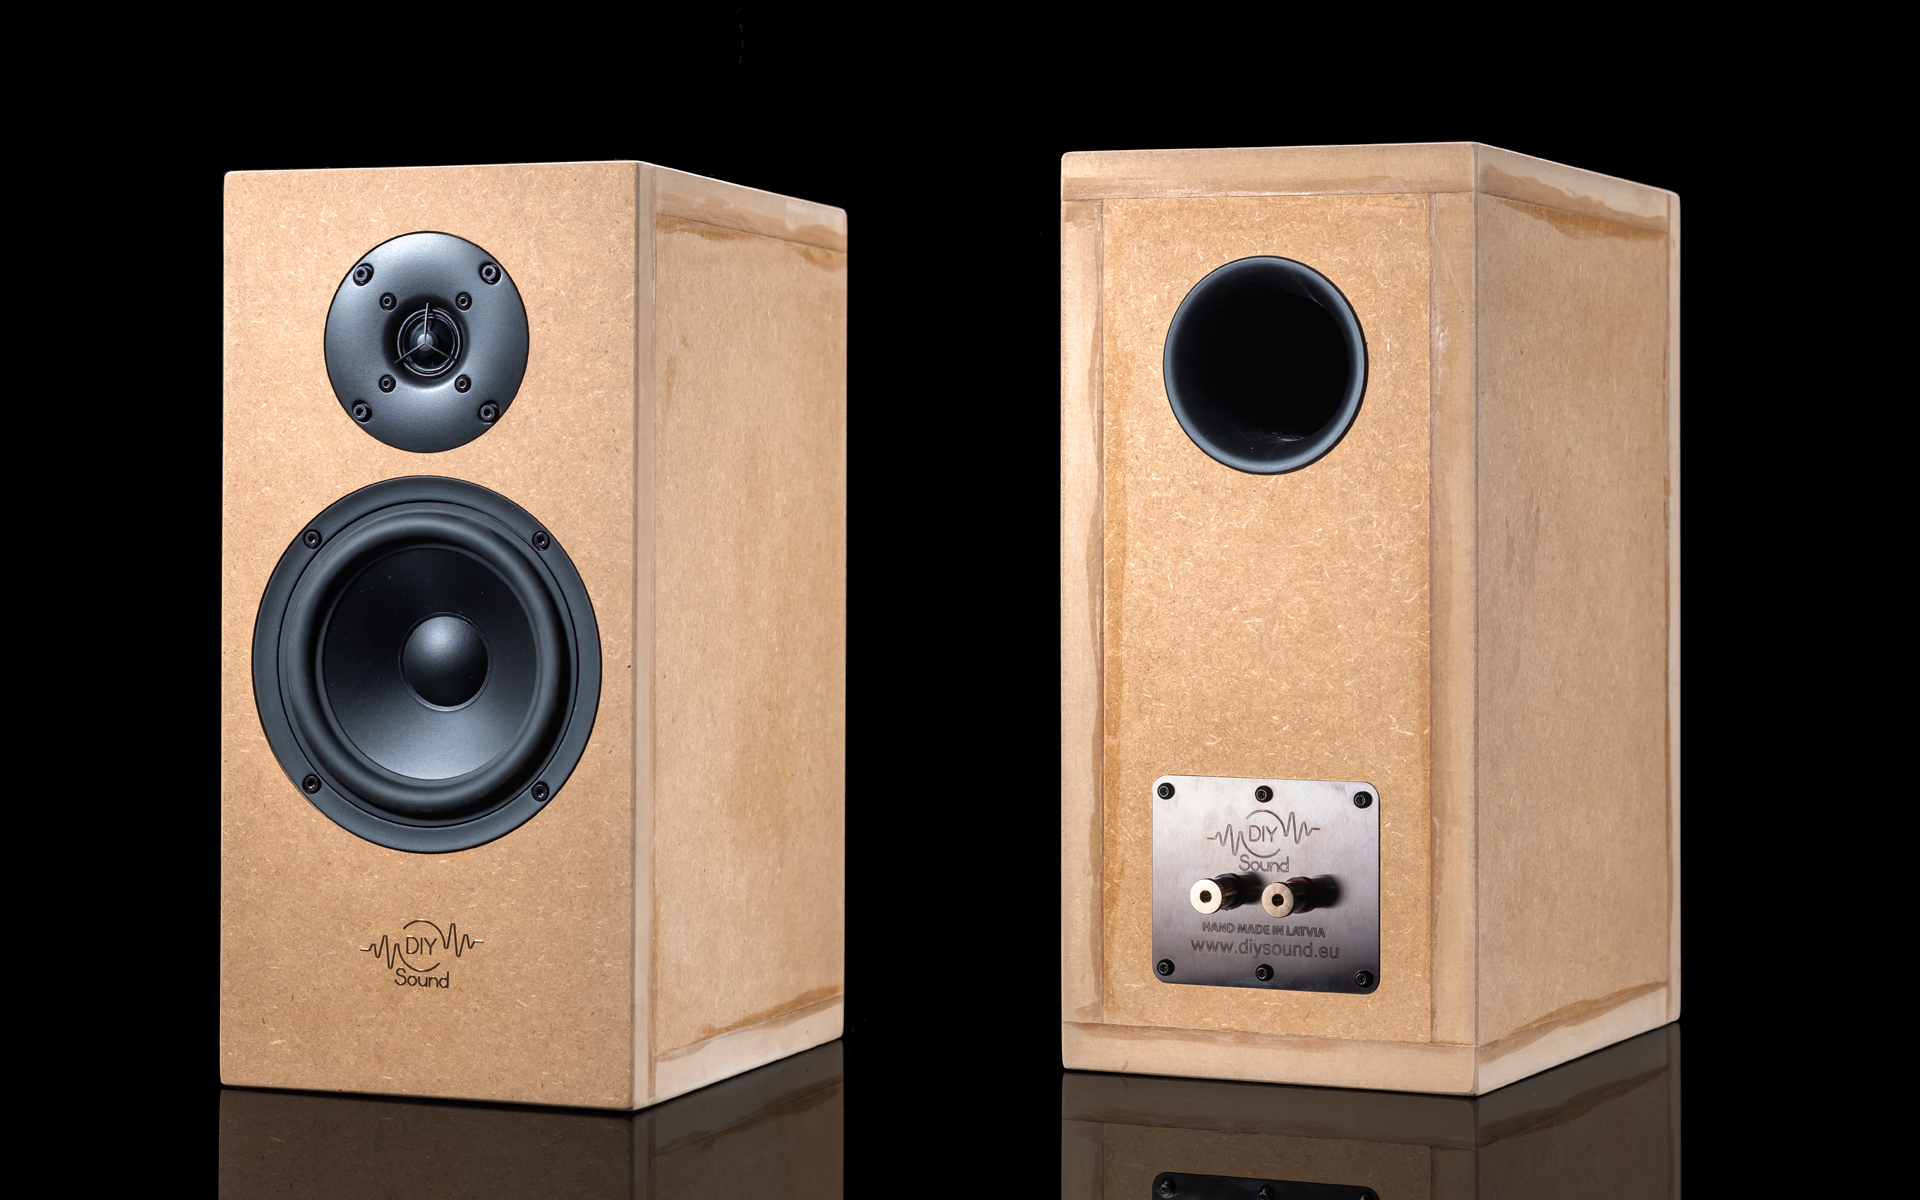 The assembly process may look intimidating considering the sheer amount of things to do and various skills needed, but it honestly isn’t. I don’t see many things which can go wrong. HDF boards are prone to chipping and delamination upon applying too much pressure aka using a hammer too forcefully, but nothing of the sort had happened during my work. I also applaud DIY Sound for using high-quality internal components, drivers and speaker terminals. The matte enclosure feels nice and smooth upon a touch. Without any lacquering or paint and with some glue residue it obviously isn’t quite finished just yet. If I had the extra time, I would’ve gladly put my painter hat on and go that extra mile. Most importantly, all HDF walls were precisely cut to size, so during the process of turning them into cabinets I encountered zero issues and didn’t have to go crazy with sanding afterwards. The effect was raw on eyes, but not rough and that’s a good thing. To further support it, I rounded all the right angles and was pleased how that turned out.
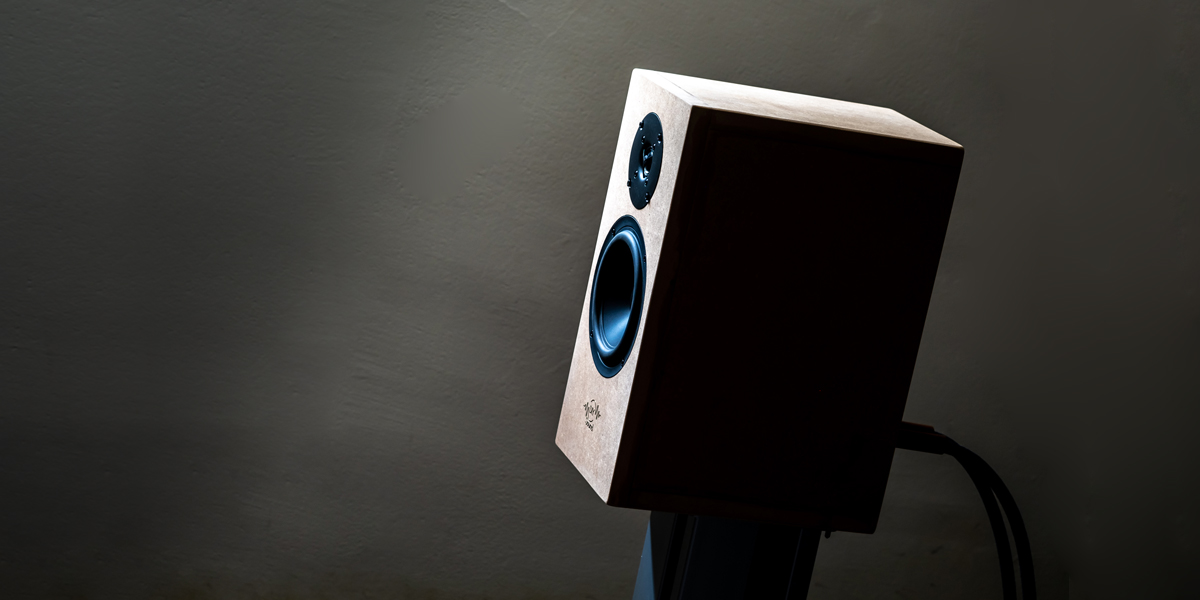
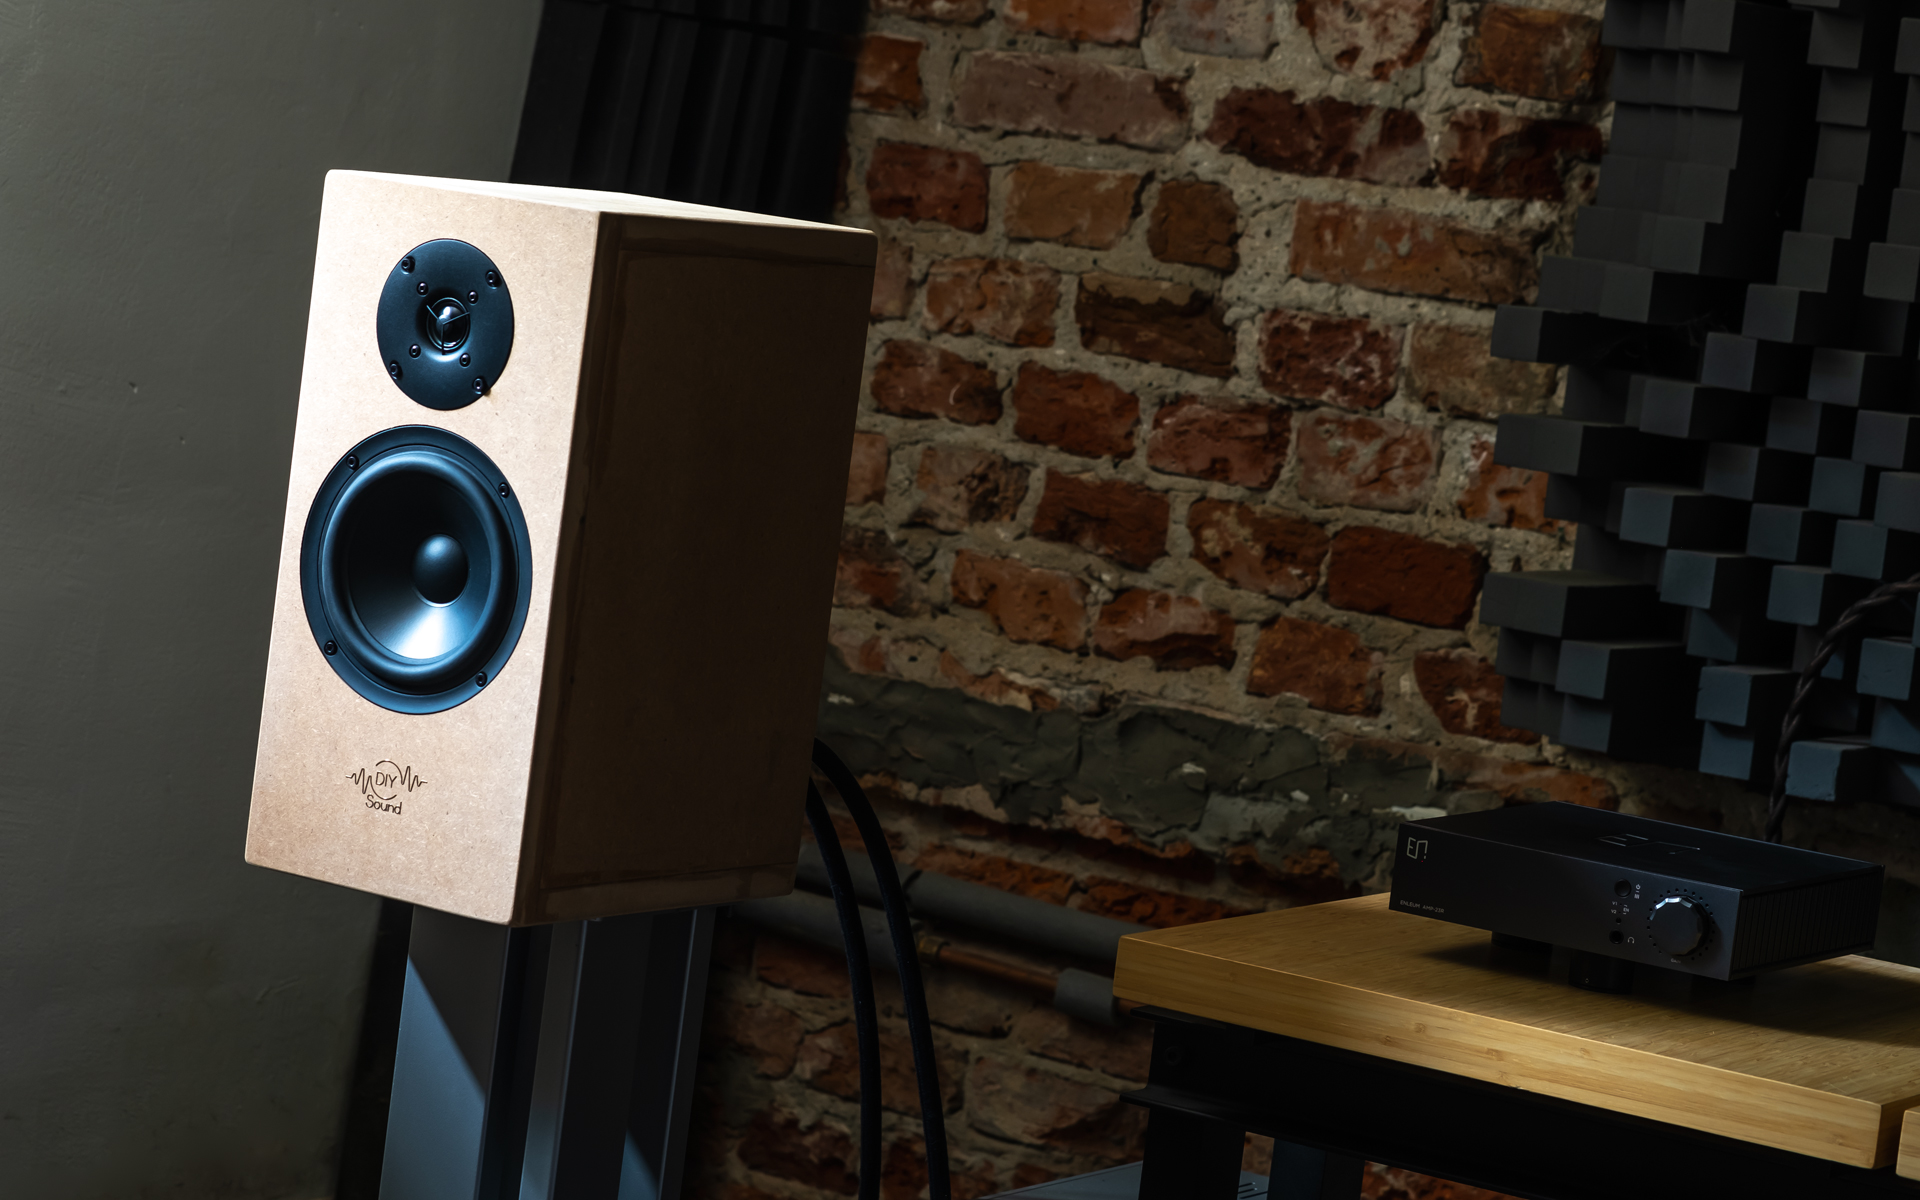 The time just before putting both speakers on their stands was tense. Even though I checked everything twice before installing the drivers in their cabinets, I was still in the dark. When the Light made its first sound without anything audibly odd going on, I finally exhaled. The manufacturer’s manual did its part well. At that moment I felt proud of myself and I imagine that most other shoppers would, too. Long story short, asking for a kit was the right decision to make. A regular vented two-way or not, the Light already was a personal winner. I got my reward. Then it grew larger. This speaker set sounds really good.
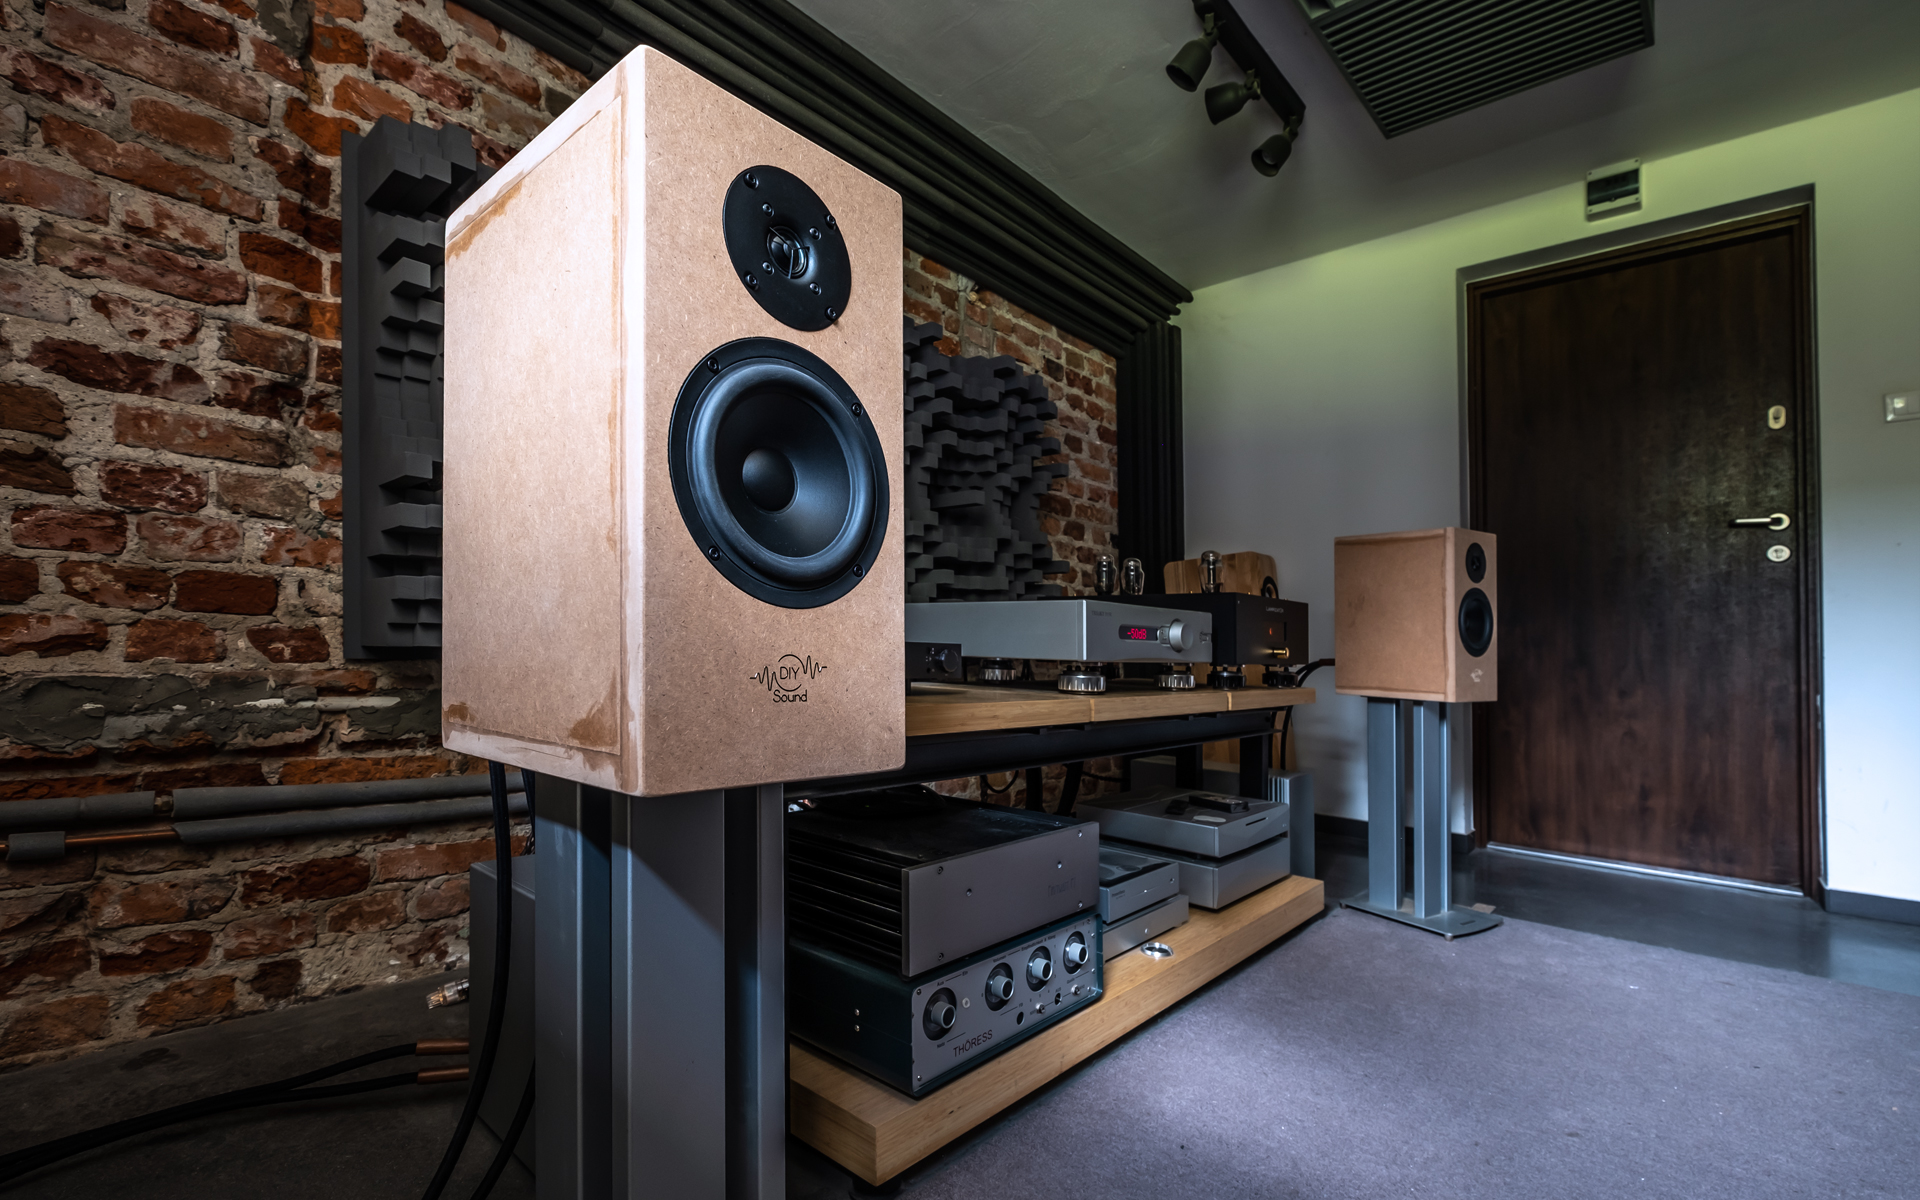
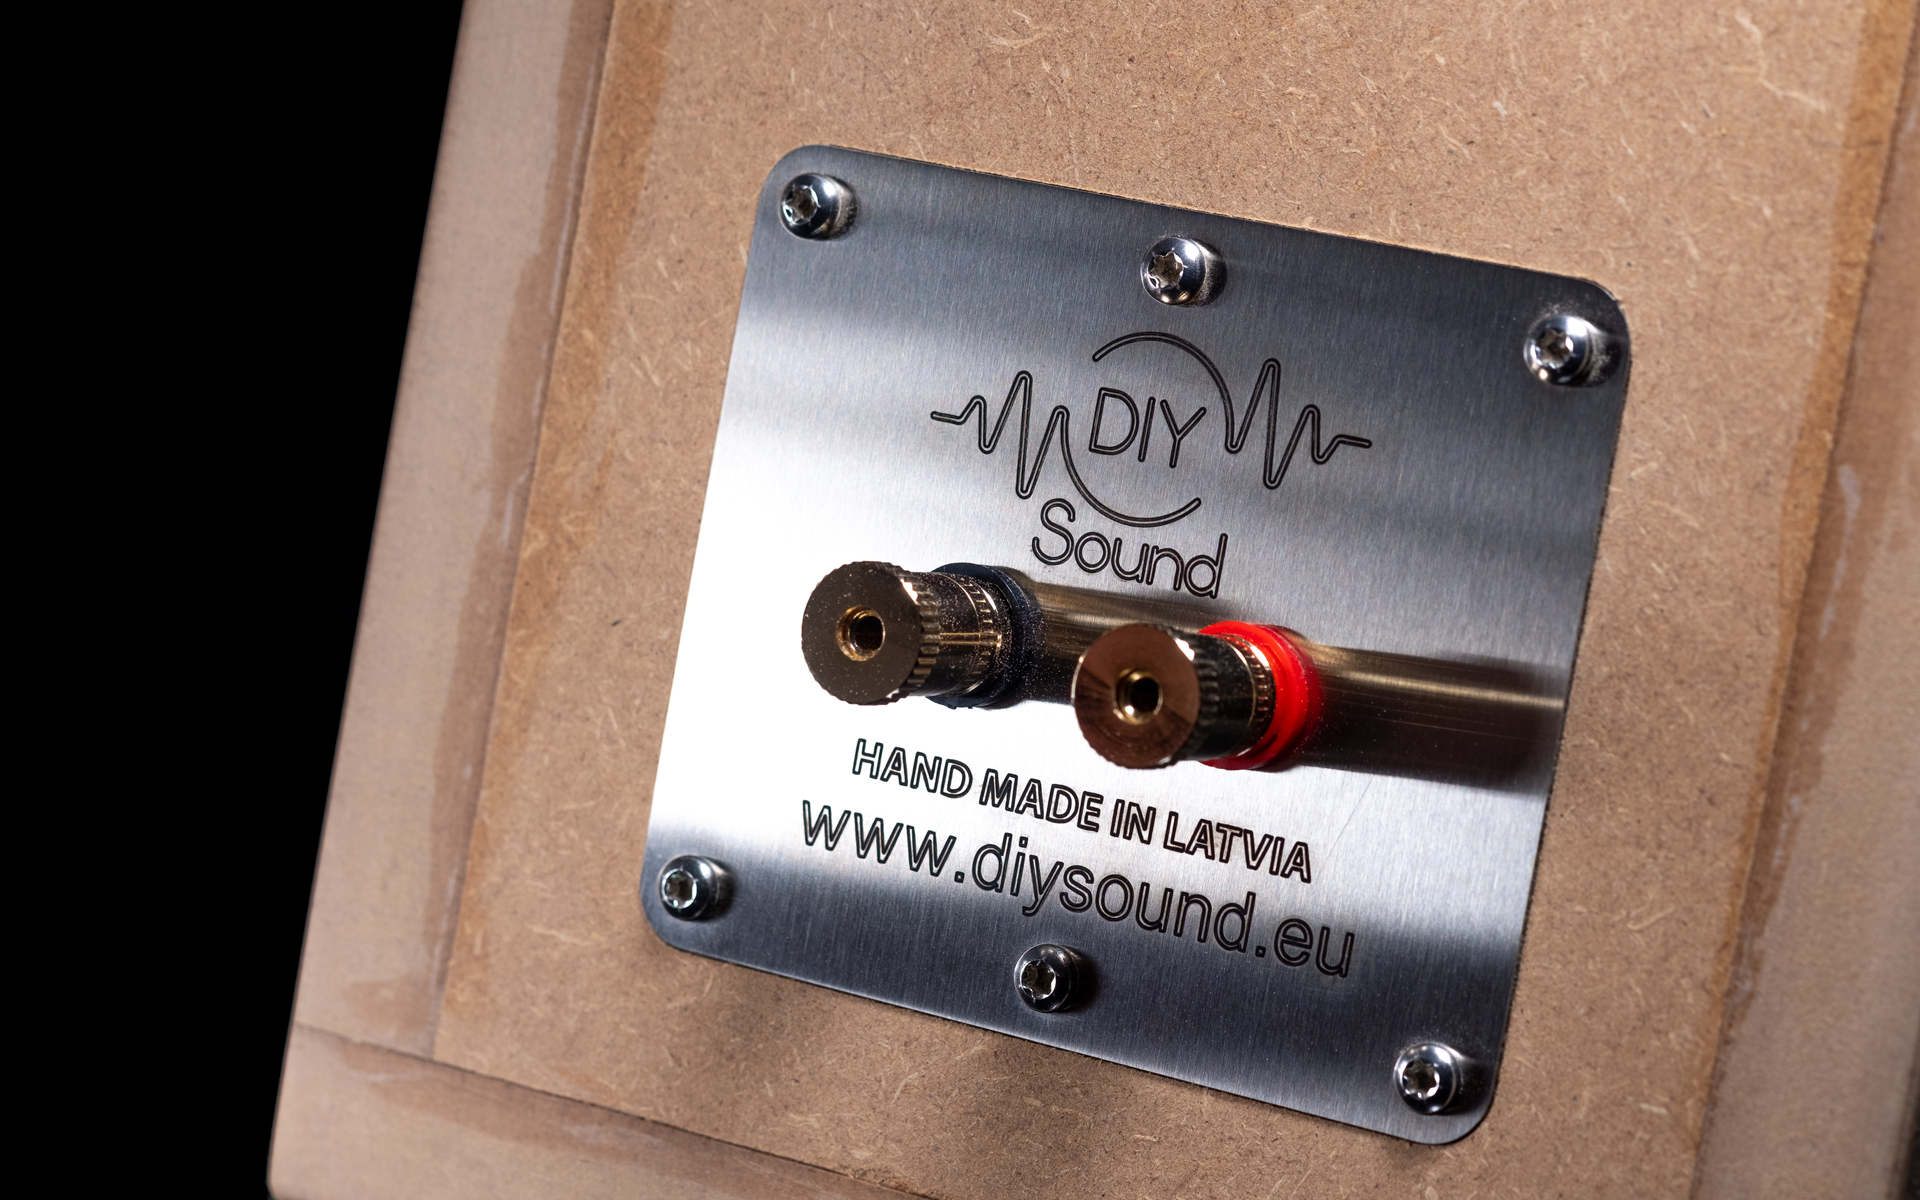 First I had to map where in my room the Light felt the most comfortable. To start somewhere, both speakers were positioned some 80cm away from the front wall without any toe in. Just several introductory seconds on Eivør Pálsdóttir’s track “Trøllabundin” sufficed to register clearly overdone massive bass output, which forced my crib to talk far more than it should. By increasing the distance by another half a meter that range became significantly leaner, on the verge of being too skinny. These two very different triangulations showed that the Light’s bass was adjustable in a rather predictable fashion. A meter of space between the listening room’s brick wall and today’s loaner provided satisfactory substance, control and reach to the bass, so I could carry on. The speakers also felt perfectly fine barely toed in. By that I mean all key sound sources on well-known tracks nicely locked into place, outlined, fleshy and sensibly wholesome. This was a great start.
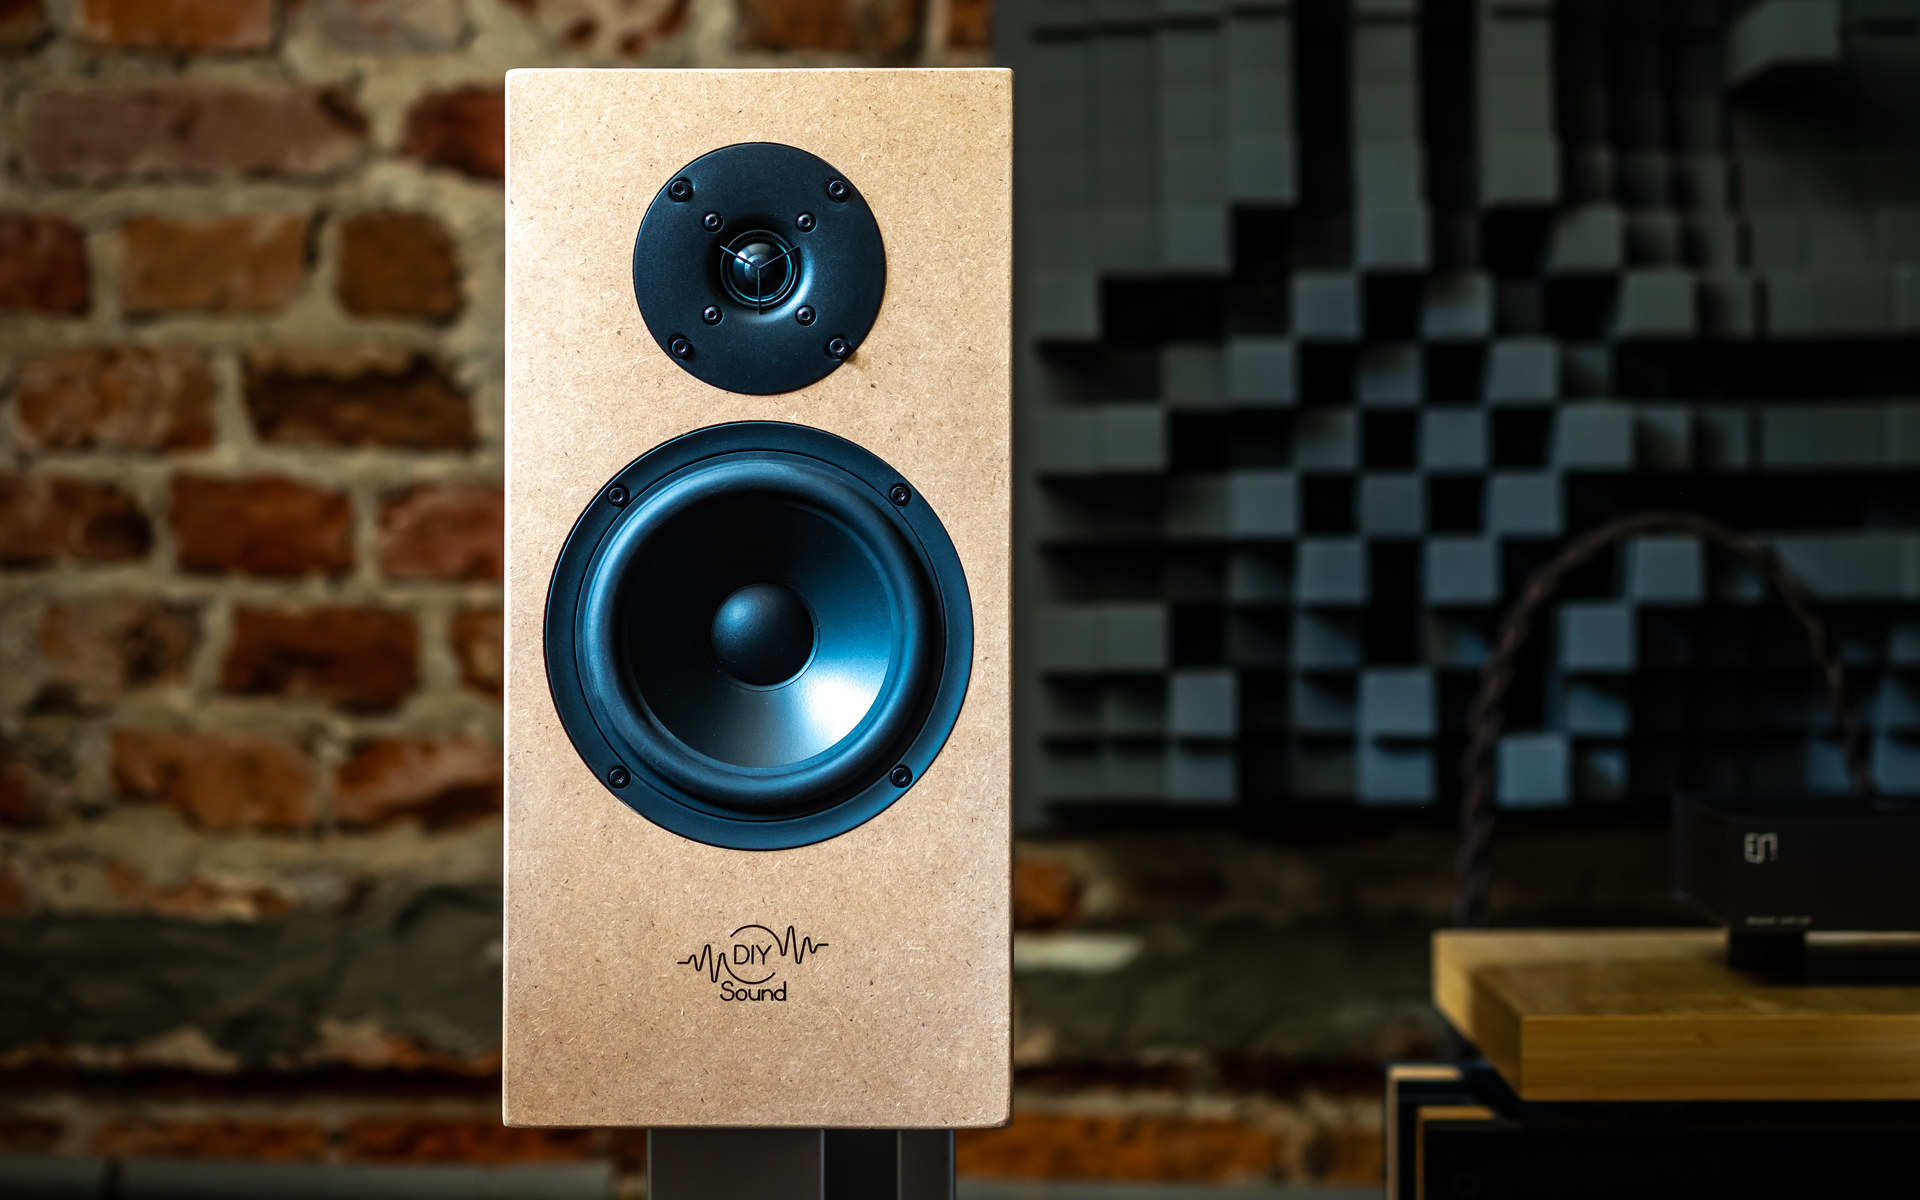 The Light positioned as explained still remained 90cm closer to the front wall than my daily driver Vox 3afw. The latter’s point-source dispersion served at some two arms’ lengths away from the listening seat results in a surrounding aural sphere, which is very wide, off-the-charts deep and busy with precisely outlined, highly articulated virtual sound sources. The Light positioned further in my room naturally couldn’t compete on the spatial front. It behaved like a conventional two-way affair, so portrayed its own sound field uniformly stretched from left to right, comprised of fewer layers and without any surrounding stunts going on. I didn’t see this as a con, just the effect of the Light’s topological pedigree. When we don’t listen to music alone, that often becomes a major asset.
 To fully tap into the spatial potency of the Vox, the listening seat is the spot to occupy. Then auditioning this Swiss marvel feels like partaking in a highly intense gig made just for us. Over the years I’d learnt that this rare virtue is inherent only to full-range speakers and some designs based on concentric drivers, so a rather exclusive club. Although the Light didn’t belong, it staged big and bold way outside the listening seat, which allowed me to enjoy it with two visiting friends. But of course I had to invite someone and proudly explain that today’s kit was assembled by you know who. It also struck me as a muscular type with tendencies for delicacy when needed. On the sheer amount of bass and highs it seemed spot on. Neither these ranges felt underdeveloped nor emphasized too strongly, as if the Light’s maker didn’t want to leave us with the impression of a monitor that tries too hard to impress with one gimmick. This one sounded effortless, full-bodied and wholesome as much as it was outlined and clear. It also was admirably smooth, which kept excess chiseling and shout at bay. On this front it actually excelled.
 On Lianne La Havas’ “Forget”, which is one of my go-to tracks to map sibilants and pointy upstairs, the Light actually did better than the Vox, in the sense that it made this particular track tonally heftier and with lesser presence and incisiveness upstairs. That’s how nice handling of overly twitchy music emerged as today’s second trait. What I really want to say is that the Light is a crowd pleaser product tailored for audible fun, not surgery and the associated fatigue. Most importantly, it also scored enough points on clarity and openness to keep things fresh, engaging and just the right kind of spicy. Add it all up and I see it as a highly capable monitor considering its price. It fares well where it’s supposed to. So much so in fact that it won’t get easily dwarfed by similarly sized regular competitors. I don’t see a reason why it would considering how many sonic bases it covers.


Since we know exactly what’s inside the Light kit, it’s very easy to do some math and arrive at the conclusion that this entire package holds some €400-500 in parts alone. The additional value to take into account is in the fact that the manufacturer already bought, labeled, cut to size and packed these components for us. Once assembled, they make a perfectly useful product that delivers on sonics by my standards, which is already enough to fully justify its sticker. The Light’s core strength and attractor however are in the assembly process that was pure fun to me. That’s why following this guide and listening to the effect afterwards felt very rewarding. This sensation honestly was a big upside on its own right. Should you feel inspired to explore the speaker DIY territory after reading this story, its highly recommended Latvian subject offers the easy start in there. Once you build this kit for yourself and have a listen to it for the first time, chances are you’ll feel the same awesome way I felt. It’s worth it!
Associated Equipment:
- Amplifier: Trilogy 995R, FirstWatt F7, Enleum AMP-23R
- DAC: LampizatOr Pacific (KR Audio T-100 / Living Voice 300B + KR Audio 5U4G Ltd. Ed.)
- Speakers: Boenicke Audio W11 SE+, sound|kaos Vox 3afw
- Transport: Innuos Statement, fidata HFAS1-S10U
- Preamplifier: Trilogy 915R, Thöress DFP
- Speaker cables: Boenicke Audio S3, LessLoss C-MARC
- Headphones: HifiMan Susvara
- Speaker signal conditioning: LessLoss Firewall for Loudspeakers, Boenicke ComDev
- Anti-vibration conditioning: 6x Carbide Base Diamond (under speakers), 6x Carbide Base Micro Diamond with TwinDamp inserts and spikes (under DAC and pre)
- Interconnects: LessLoss Entropic Process C-MARC, Boenicke Audio IC3 CG
- Power components: Gigawatt PC-3 SE EVO+/LC-3 EVO, LessLoss C-MARC, LessLoss Entropic Process C-MARC, Boenicke Audio Power Gate, ISOL-8 Prometheus
- USB components: iFi audio Mercury3.0
- Rack: Franc Audio Accesories Wood Block Rack 1+3
- Network: Fidelizer EtherStream, Linksys WRT160N
- Music: NativeDSD
Retail prices of reviewed components in EU (incl. VAT):
- DIY Sound Light: €899/pr
Manufacturer: DIY Sound